Ads keep our service free · We don't endorse advertised products.
Ads keep our service free · We don't endorse advertised products.

How to accept Cryptocurrency on your website.
In this article we are going to show you how to integrate a CryptocurrencyCheckout payment button into your store so that you can start accepting Cryptocurrencies like Bitcoin, Litecoin, Dash and Ethereum as payment for your items/services.
There are several ways to integrate Cryptocurrency Checkout into your website. However for this article we will show you one of the easiest ways to integrate payment buttons for individual items that should work on virtually all websites where you are able to create/edit the HTML code.
What you can expect from this integration.
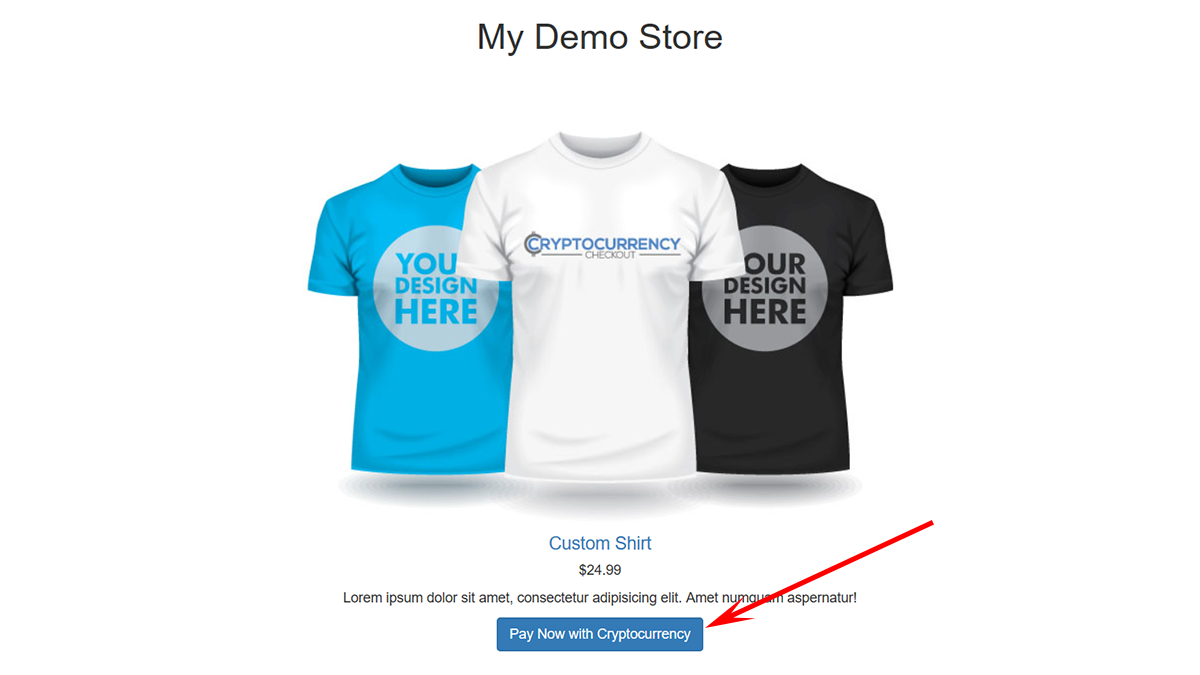
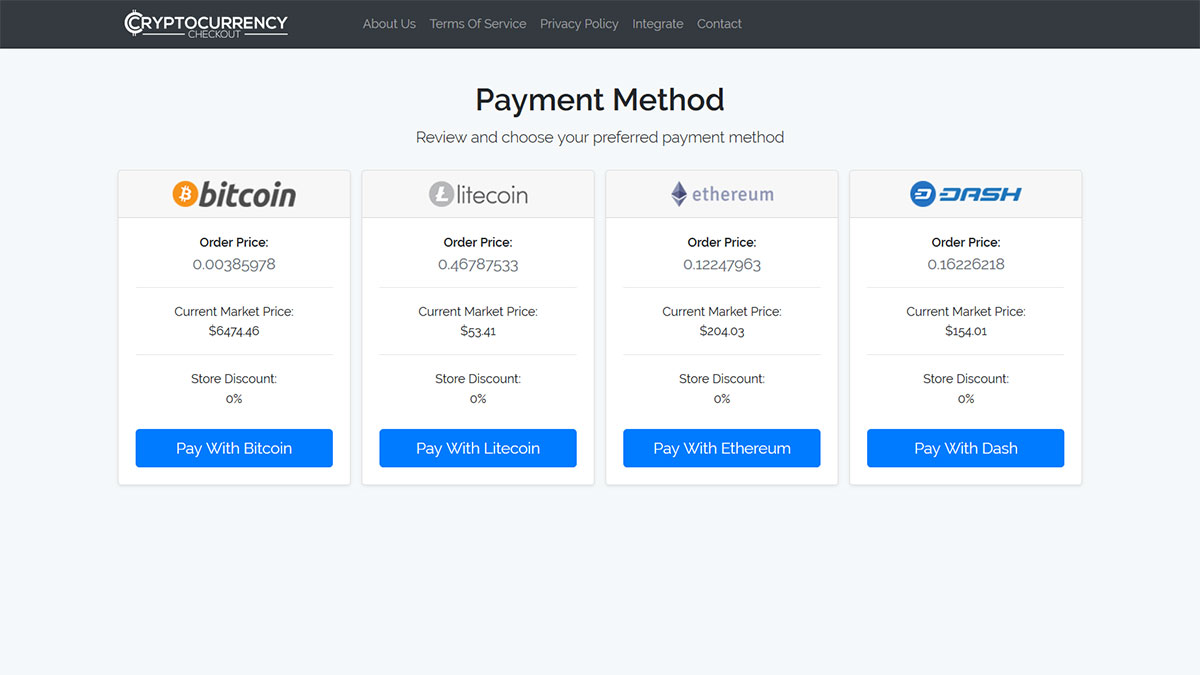
- We will be creating payment buttons for individual items, each item will have a static price (Example: $29.99) and item ID (Example: MyItem001). This is especially good for people that only sell a few items on their website.
- The installation will be fairly simple, all you will need to do is generate the script, and paste it onto your site where you want the button to be located.
- Please note: You may want to do some styling or CSS to get the button to look and be positioned exactly the way you want.
Now that we've discussed how we plan to integrate, let's get started with the installation.
CryptocurrencyCheckout Button Installation.
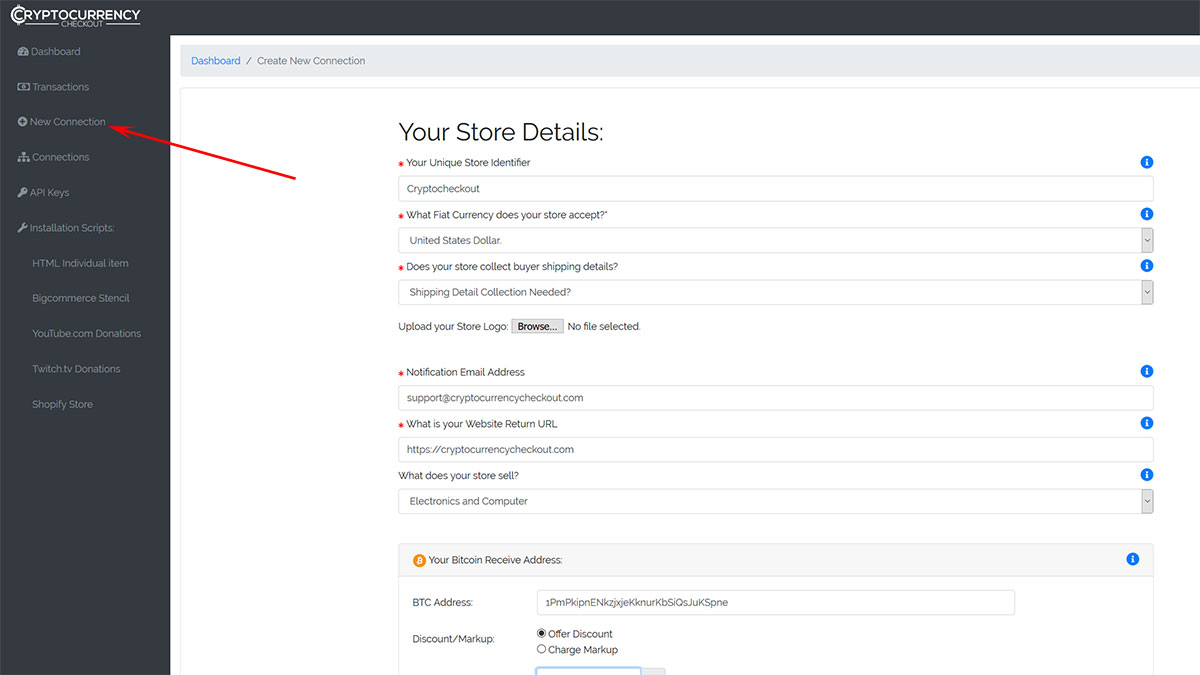
Step 1: Create Cryptocurrency Checkout Connection.
Log into your CryptocurrencyCheckout.com Dashboard.
Click on the “New Connection” option.
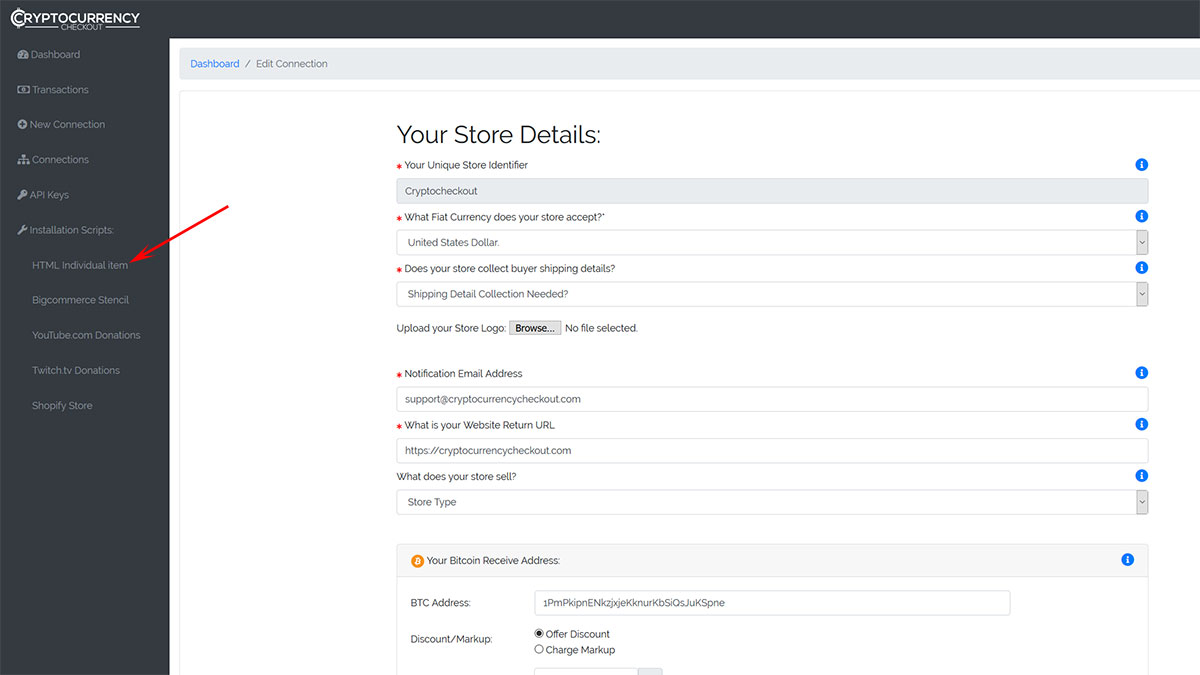
Insert your store details.
Now insert the wallet addresses of all the Cryptocurrencies you would like to receive.
Select if you would like to charge a markup to accept crypto, or offer a store discount.
If there is any cryptocurrencies you do not want to accept on your store, just leave the section blank.
Click Submit.

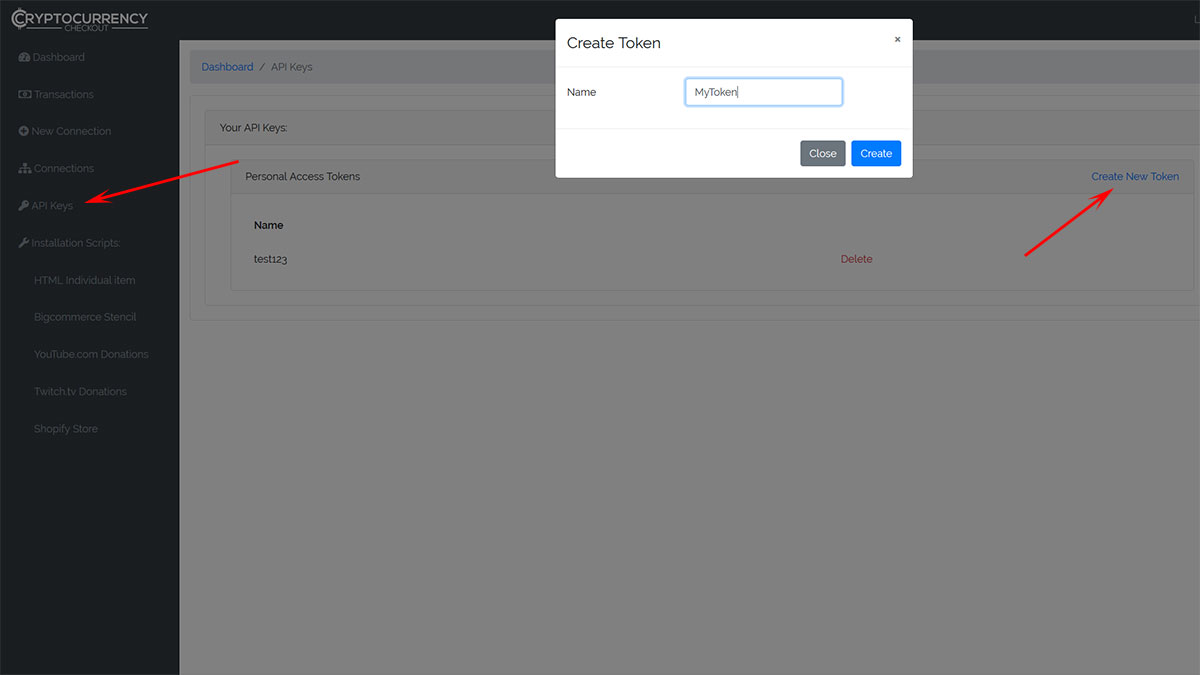
Step 2: Generate CryptocurrencyCheckout Script.
Log into your CryptocurrencyCheckout.com Dashboard.
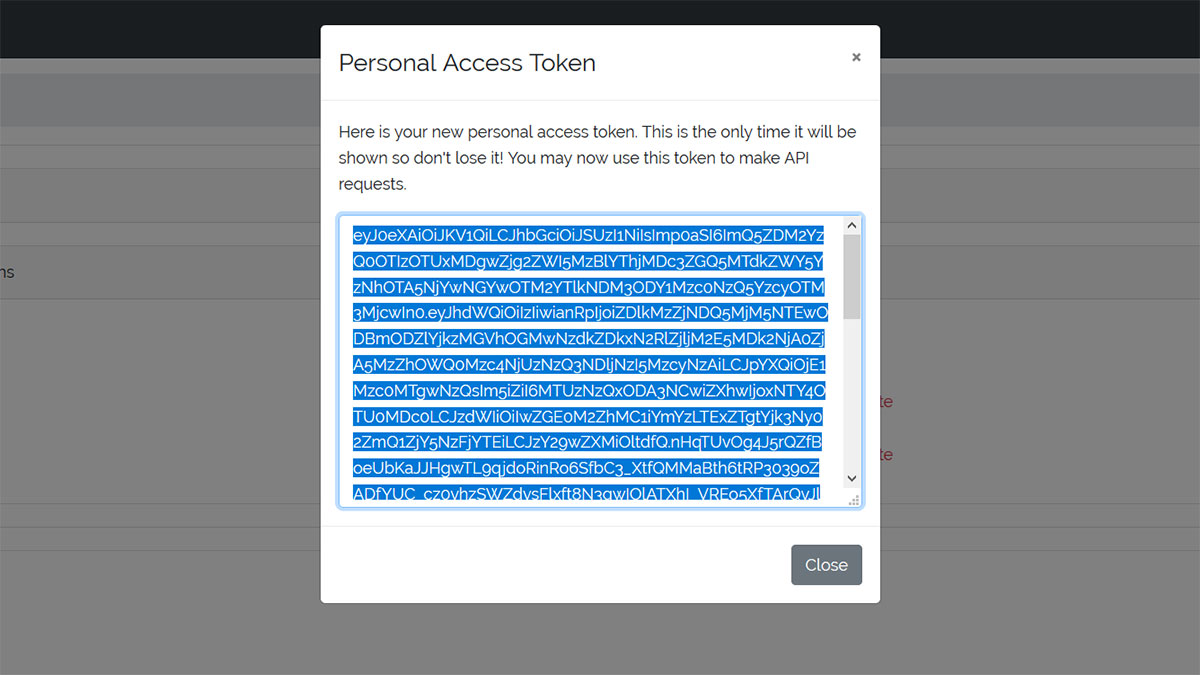
Click “API Keys” Generate an API key for your store.
Copy and paste the API Key into notepad, or another text editor for later.
In the dashboard, go to the installation scripts section, and select “HTML Individual Item”
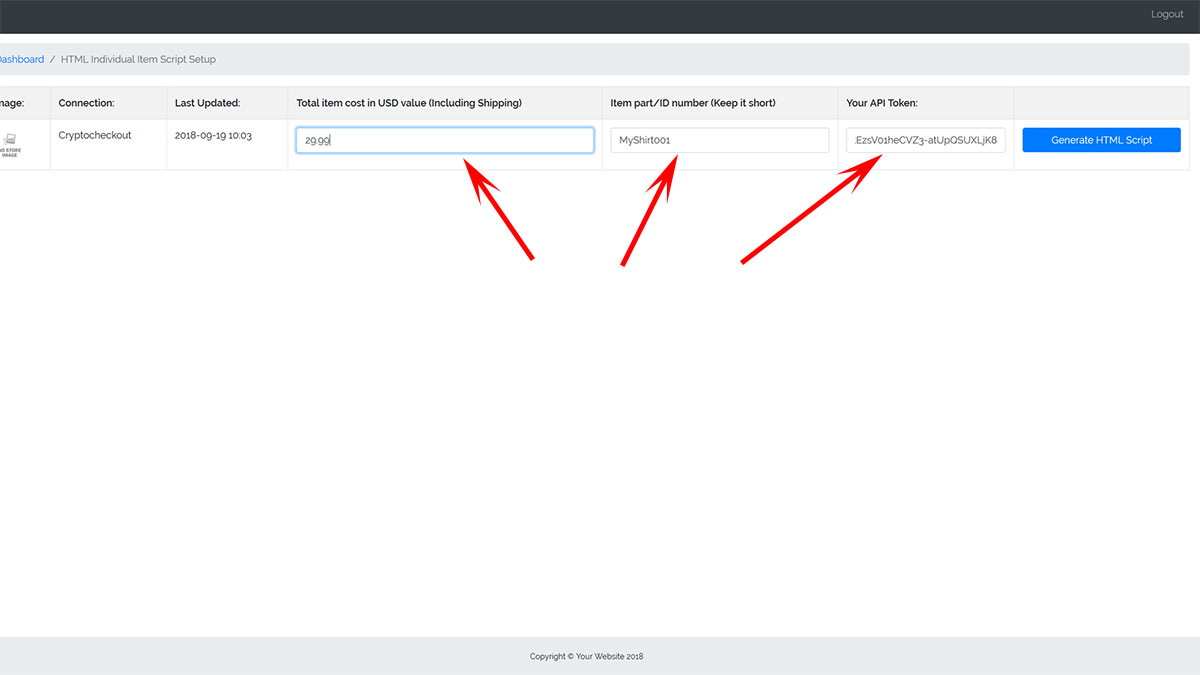
Paste the API key you saved earlier into the “Insert API Key” Section.
Input your item price in dollars. Example: 29.99 (Do not use a dollar symbol)
Add a custom Item ID, this is whatever ID you want to identify your items, each item should differ. (Example: Shirt001)
Click the “Generate HTML Script” button.
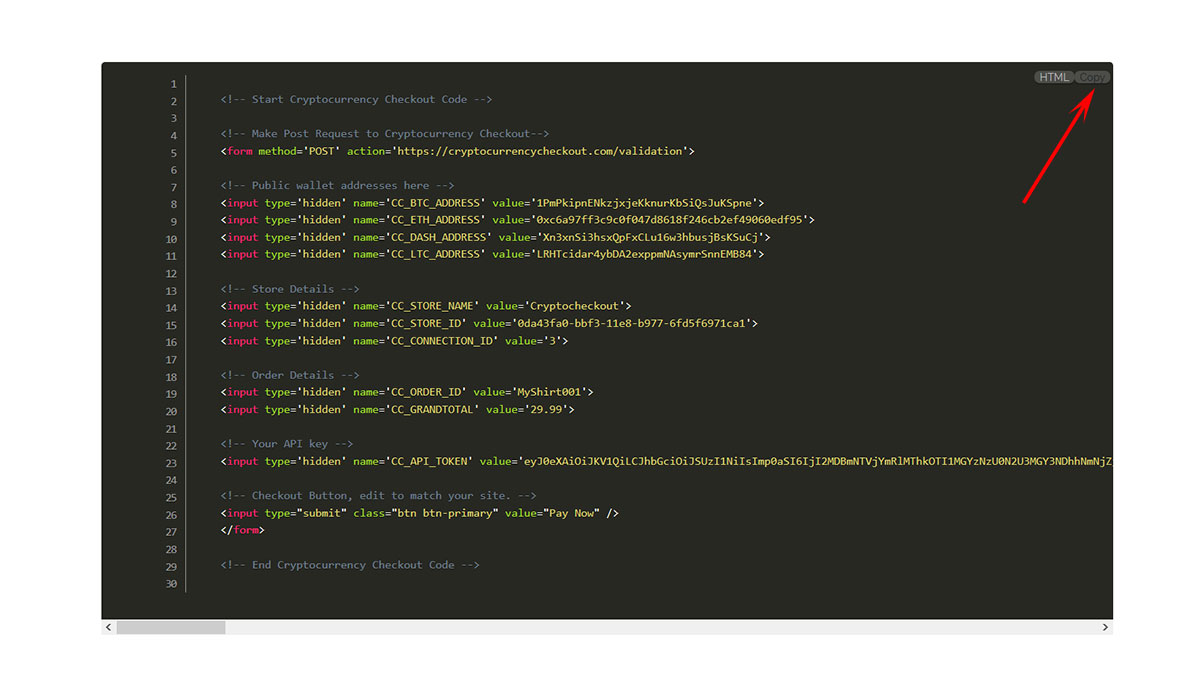
Your installation script will be automatically generated for your store.
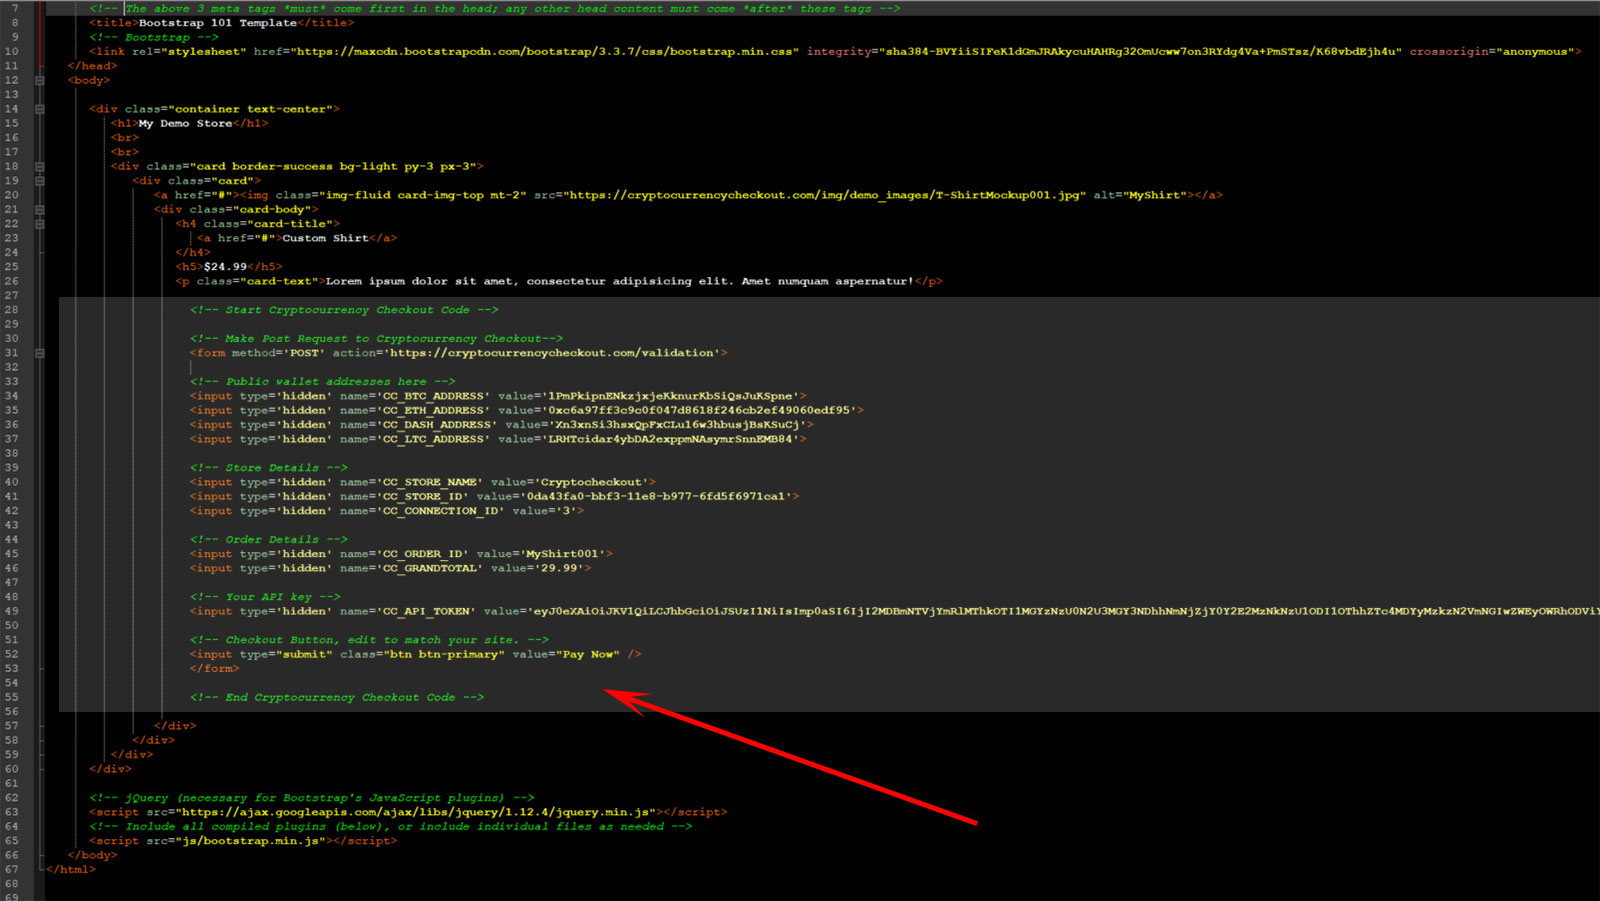
Copy the script and paste it into a text editor.
Step 3: Install the Button into your Website.
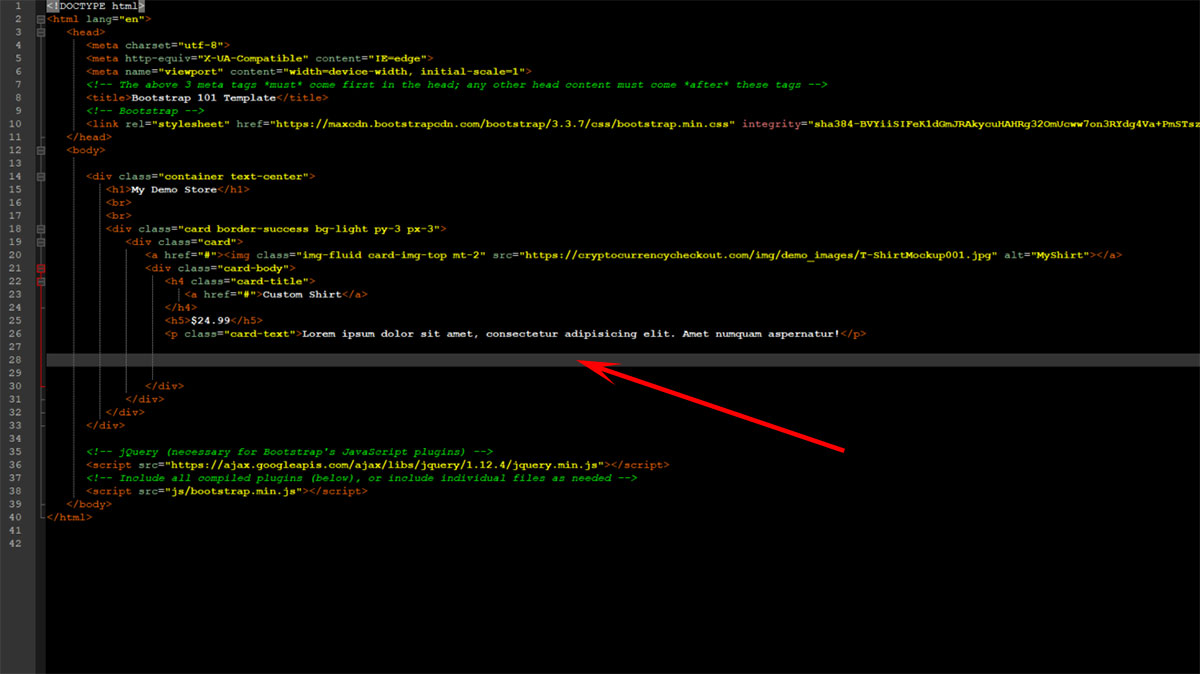
Start editing the HTML code on your website.
Locate the position where you want your button installed on your page. (Under the item details in my website.)
Paste the generated script into the position where you want the button located.
You can edit the looks of your button by editing the class value, or change the name by editing the input value. You can also add a style tag for inline styling.
Save your code and test / edit as necessary.

You have successfully integrated Cryptocurrency Checkout into your website!
We suggest you generate a test order on your store. and go through the entire checkout process to make sure everything works as desired.
If you have any issues feel free to send us a message, or join us on discord.
Ads keep our service free · We don't endorse advertised products.
Ads keep our service free · We don't endorse advertised products.