
How to Setup PiratePay Standalone Decentralized Payment Gateway.
- Table of Contents:
- Introduction - The PiratePay Payment Gateway Application.
- Why use PiratePay to accept Pirate Chain?
- What are the Benefits of accepting PirateChain (ARRR)?
- Why you should use a Virtual Private Server, or Dedicated Server.
- Minimum Server Requirements to run PiratePay and the Wallet.
- Some Important Security Notes before we start.
- Step #1: Create a Swap File and extending Virtual Memory.
- Step #2: Install the Komodo/PirateChain wallet and Bootstrap.
- Step #3: Generate some High Difficulty Passwords that PiratePay will use.
- Step #4: Setting up the LEMP Stack (Linux, Nginx, MySQL, PHP) for the PiratePay App.
- Step #5: Installing Redis Queue Manager and Supervisor.
- Step #6: Installing the PiratePay Payment Gateway Application.
- Step #7: Accessing your PiratePay App and Testing.
- Adding SSL Encryption between PiratePay and your Store.
- Available PiratePay Plugin Installation Guides.
Introduction - The PiratePay Payment Gateway Application.
PiratePay is a fully decentralized, open source payment gateway that allows you to accept Pirate Chain ($ARRR) on your websites and stores. PiratePay removes the need for a middleman and is built with the utmost level of privacy and security in mind.
The PiratePay app is designed to be more intuitive and more secure than using traditional RPC Servers to communicate with your stores.
We accomplish this by putting your $ARRR wallet behind a feature rich RESTful API that offers price conversions, transaction records, increased security features such as Oauth2 authentication, as well as a graphical dashboard. Additionally, a built-in job queue manager which monitors your wallet transactions and communicates with your store’s API to update the status of order payments.
Why use PiratePay to accept Pirate Chain?
Powerful – Operating wallets while simultaneously processing transactions can take up significant computing power. By removing this workload off of your store’s backend, PiratePay frees up valuable resources enabling you to accept up to thousands of transactions an hour without bogging down your website load times.
More Secure – The PiratePay app improves wallet security by placing the public facing wallet RPC server behind a protective fence that implements higher security standards and limits communication to the wallet’s inbound functions only. In the unfortunate event that your credentials are compromised, this security strategy mitigates the situation keeping your coins safe.
More intuitive – The PiratePay Dashboard makes it easier to monitor:
- Order and payment transaction associations,
- Expected $ARRR payment amounts,
- Partial or incomplete payments,
- Receipt of full payments,
- Crypto to fiat conversions.
What are the Benefits of accepting Pirate Chain ($ARRR)?
Reduced Risk – Pirate Chain ($ARRR) cannot be charged back. This means no hefty chargeback fees, penalties, suspended accounts or fraudulent transactions to deal with. (This is especially beneficial when selling digital goods where most payment services offer little to no chargeback protection.)
No Middleman Fees – By using the PiratePay app to operate your own Payment Gateway, you process all of your own transactions and will never again be charged third party transaction fees, processing fees, monthly fees, or service fees.
Stay Decentralized – Be in full control of your wallets, coins, and keys. With PiratePay there is no third party involved in any step of your crypto transactions. All your transactions will transfer from your customers’ wallets directly to yours. Meaning no third party will ever be in control of your coins.
Ease of use – Once PiratePay is setup, it will automatically start processing and monitoring all transactions. The app instantaneously relays order status and updates back to your store as purchases are received. This feature saves you the time and effort of having to manually confirm and mark payments as sent.
Why you should use a Virtual Private Server, or Dedicated Server.
To host the Pirate Chain Wallet and PiratePay App, it is recommended that you use a Virtual Private Server (VPS) or a Dedicated Server. Most shared hosting and some cloud hosting solutions might not be able to handle the requirements of the Pirate Chain Wallet.
This is because shared hosting uses common resources shared amongst numerous websites. To accomplish this, each account is restricted to a limited amount of resources that can be used at any given time.
Unfortunately these resource restrictions can change at any time and cause issues with the Pirate Chain wallet. During times of high load the shared hosting provider may restrict memory access, slowing down or freezing the wallet, and hence preventing the PiratePay app from communicating with it.
This is why in most cases the Virtual Private Server or Dedicated Server are preferred options. Under the terms and agreements with your provider, the host must provide you with a specified amount of computing resources at all times to meet their contractual agreements. This ensures that valuable resources are dedicated to your server regardless of circumstances.
Minimum Server Requirements to run PiratePay and the Wallet.
We have found that the Pirate Chain Wallet/Full Node uses just shy of 3gb of ram and the PiratePay app is light weight enough to operate on 512mb of ram. Through our tests we have been able to get the Wallet and App to operate on a server with 2gb of ram + 2gb swap file, extending the virtual memory to around 4gb of ram to operate the full package.
Processor: 1vCPU.
Storage: 30GB HDD or SSD.
Memory: 2GB Ram + 2GB Swap File = 4GB Virtual Memory.
Transfer: 1TB should more than suffice in most cases.
Operating System: We will be using Ubuntu 20.04, but 18.04 would suffice as well.
Some Important Security Notes before we start.
Although PiratePay provides additional Front End Security features compared to standard RPC Wallet Servers, PiratePay does not protect against any situation where an attacker gains backend or root access to the server. Utmost care must be taken to secure and protect the server’s backend.
Some Security Things to Consider before we start:
Never install Wallets or Web Applications in your Roots directories. (This is a significant security risk if an attacker ever finds a vulnerability within the front end code.) Always use another user account like "ubuntu" in the case of this guide.
To better protect your wallet it is recommended that you secure your server with both SSH RSA Encryption Keys and a Passphrase. (Requring two levels of authentication to gain access to the Server Backend.)
I also recommend fully disabling FTP access when not in use. And if you have external Firewall based Port Rules, even disabling SSH when not accessing the server (temporarily blocking all backend access when not performing backend maintenance tasks), or at the very least white listing it so only specific IP addresses are capable of accessing the server through FTP and SSH.
A Note for the above: Do not block access to all SSH ports from inside the server or you may lose the ability to access the server. Only disable SSH ports if you have external firewall port rules like Amazon Lightsail or AWS dashboard to enable/disable these settings from outside the server itself.
As a final security note: As with all web security, no security method is completely foolproof. Users should still implement safe security practices, such as: strong passwords, strong server security, monitor server logs for malicious/repetitive attempts, ban malicious IP addresses, and so on.
Now that we've got that out of the way, let's get started with the installation.
Step #1: Create a Swap File and extending Virtual Memory.
Before we start: For easier copy and pasting I recommend using Putty client, which is a free SSH access client.
SSH into your servers non-root user.
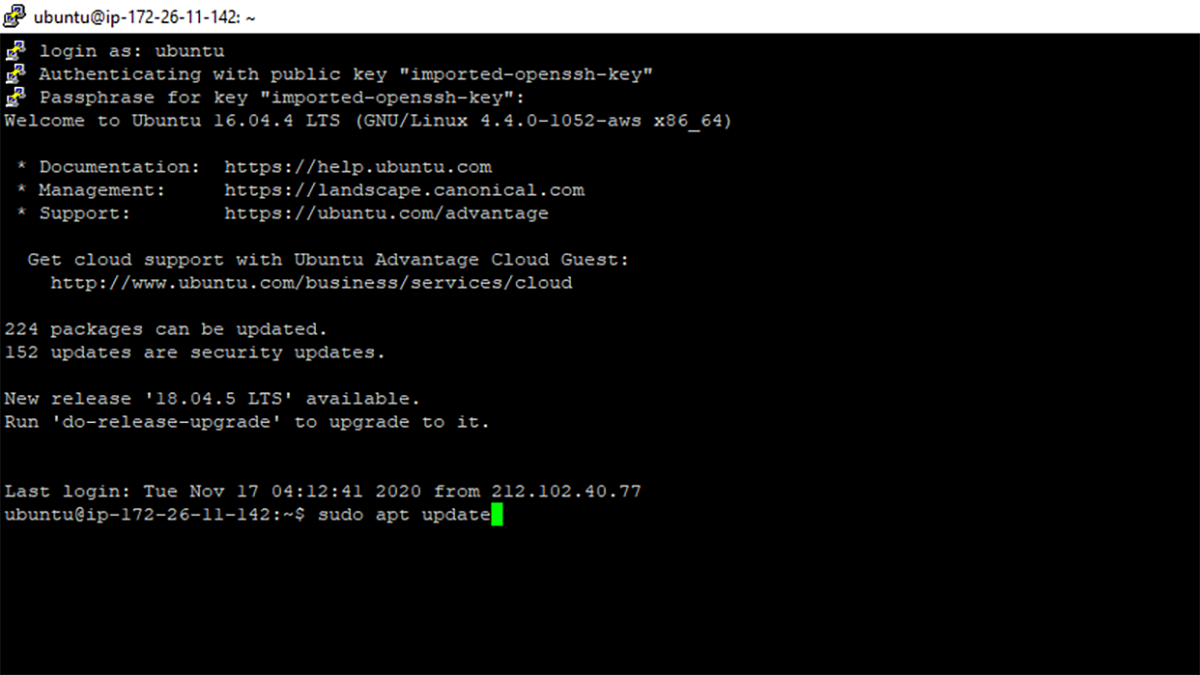
Copy and Paste following commands one line at a time to update your servers packages and get a few things we'll need before we get started: Example Image.
sudo apt update
sudo apt-get upgrade
sudo apt-get install htop
Now let's add some additional Virtual Memory for the server to use.
To check if you have any swapfile currently setup:
sudo swapon --show
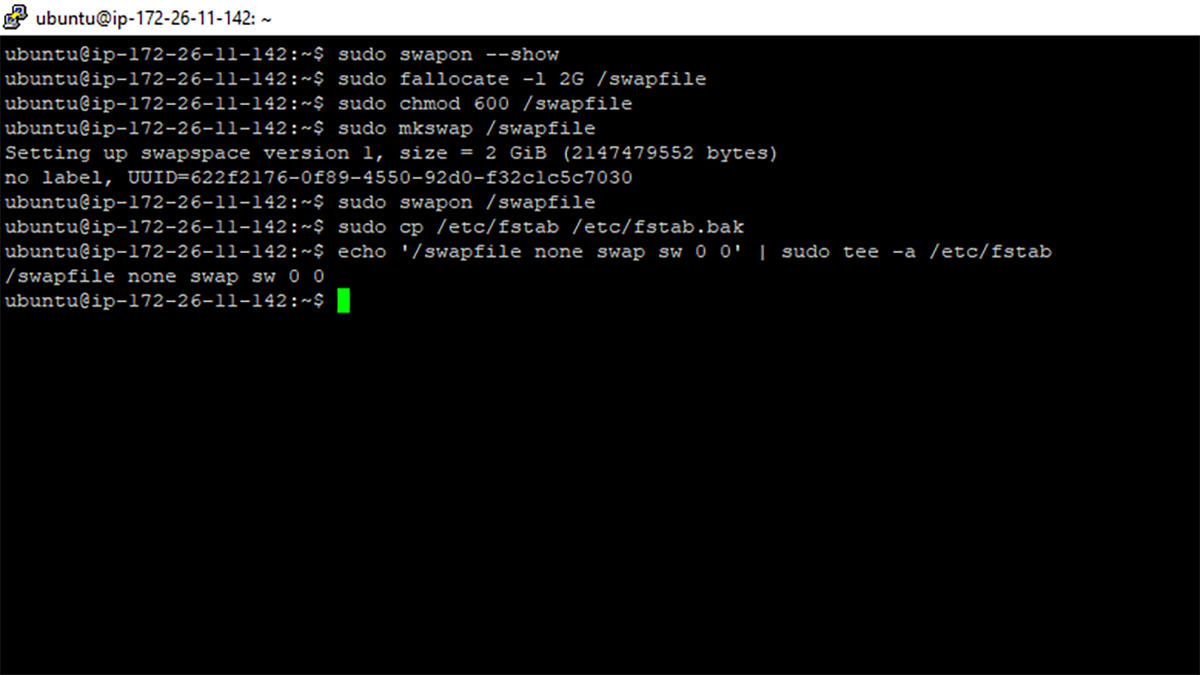
If that commands returns empty/blank with no details, we can setup the swapfile with the following commands: Example Image.
sudo fallocate -l 2G /swapfile
sudo chmod 600 /swapfile
sudo mkswap /swapfile
sudo swapon /swapfile
Create a backup and make these swapfile changes permanent:
sudo cp /etc/fstab /etc/fstab.bak
echo '/swapfile none swap sw 0 0' | sudo tee -a /etc/fstab
Now let's Restart the server:
sudo shutdown -r 0
Once booted, we'll check htop to confirm the swap file stayed active.
htop
At the top of the page you should notice a "Mem" bar and a "Swp" bar each of these should show around 2Gb max.
Both of these together should equal around 4GB of virtual memory. Example Image.

Step #2: Install the Komodo/PirateChain wallet and Bootstrap.
SSH into your non-root user.
Enter these commands one line at a time to create the PirateChain User Data Folder.
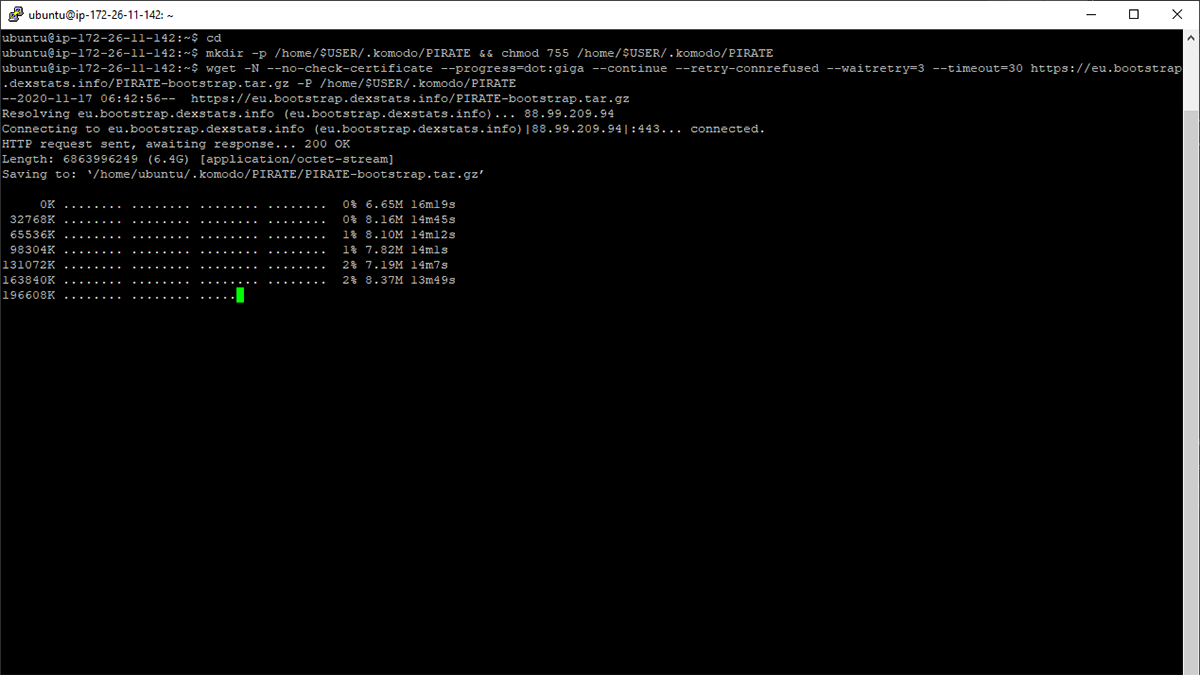
cd
mkdir -p /home/$USER/.komodo/PIRATE && chmod 755 /home/$USER/.komodo/PIRATE
Download the PirateChain Bootstrap with this one command: Example Image.
wget -N --no-check-certificate --progress=dot:giga --continue --retry-connrefused --waitretry=3 --timeout=30 https://eu.bootstrap.dexstats.info/PIRATE-bootstrap.tar.gz -P /home/$USER/.komodo/PIRATE
Extract the Bootstrap into the folder we made:
tar -xzvf /home/$USER/.komodo/PIRATE/PIRATE-bootstrap.tar.gz -C /home/$USER/.komodo/PIRATE
Now let's Download the Komodo/PirateChain Wallet:
wget --no-check-certificate --content-disposition https://github.com/KomodoPlatform/komodo/releases/download/0.6.1/komodo_linux_0.6.1.tar.gz -P /home/$USER/
tar -xzvf /home/$USER/komodo_linux_0.6.1.tar.gz -C /home/$USER/
mv /home/$USER/linux64 /home/$USER/komodo
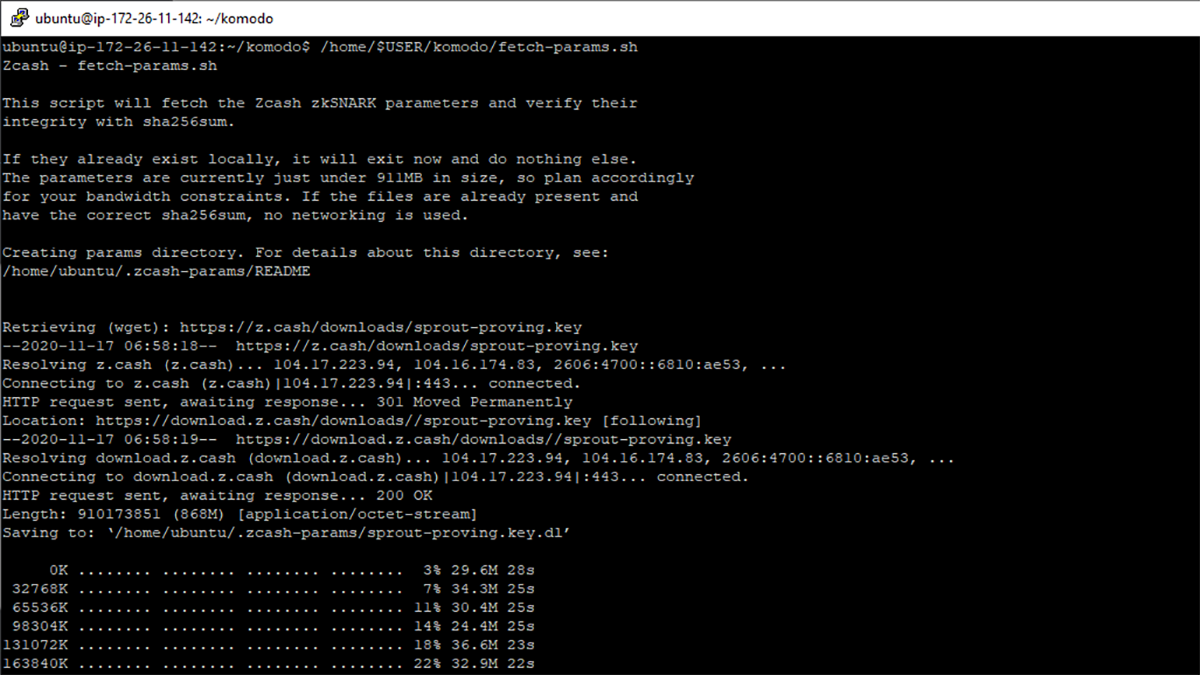
Now we'll fetch the params and start the PirateChain Wallet: Example Image.
cd komodo
/home/$USER/komodo/fetch-params.sh
./komodod -ac_name=PIRATE -ac_supply=0 -ac_reward=25600000000 -ac_halving=77777 -ac_private=1 -addnode=178.63.77.56 &
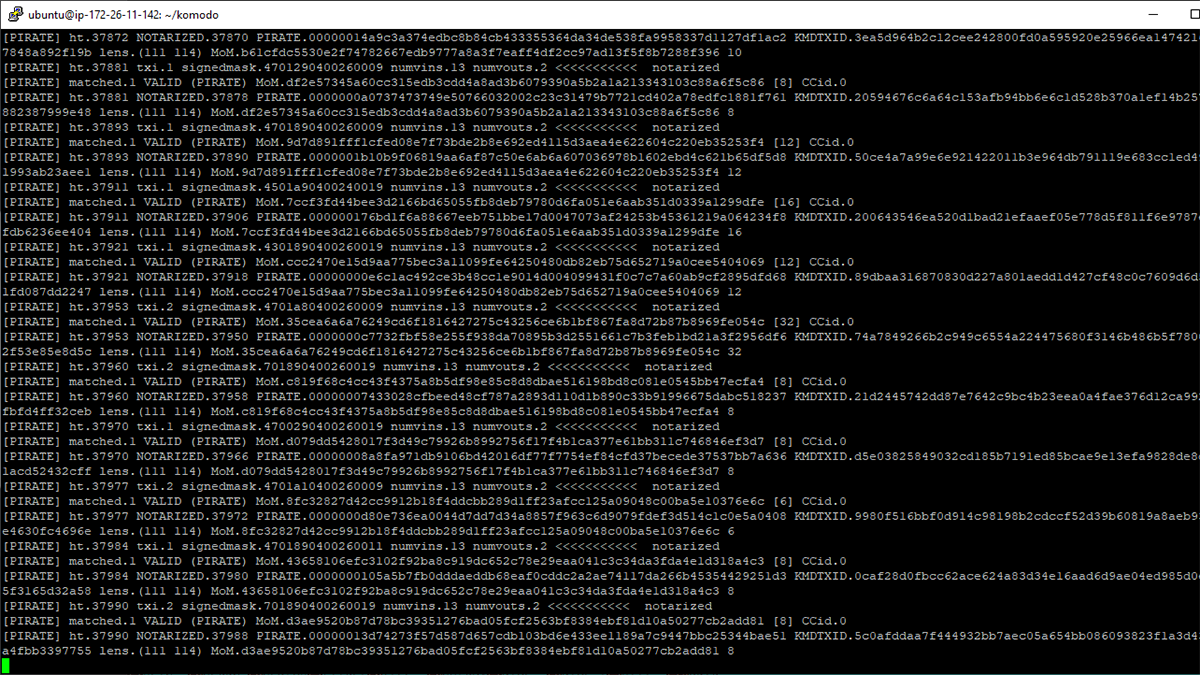
Please Note: It will typically take 10-15 minutes for the wallet to start up, after that it will do a few lines of dots ... When that finishes you'll start to get a list of blocks, looks like [PIRATE] ht.1145000. The ht section indicates block height. If this number starts under 1140000 I'd suggest using htop in a second SSH command line to kill the wallet, try extracting the bootstrap again in the steps above and then start the wallet again.
You can check the current block height on the Pirate Block Explorer, once your wallet has reached the current block height open a second SSH command line and execute the following commands:
cd komodo
./komodo-cli -ac_name=PIRATE getinfo
If successful you'll receive a list of the current block stats and wallet info.
While still cd'd into the komodo folder you can now use the following command to stop the wallet daemon:
./komodo-cli -ac_name=PIRATE stop
Please note: You must let the Komodo/PirateChain wallet fully shut down before restarting the server. Shutting down the wallet while it is syncing with the blockchain can corrupt the block files, and force you to completely resync the entire blockchain all over again.
To verify if the wallet has fully stopped, you can type:
htop
And watch until the komodod pirate process is gone from processes. You'll also notice memory returns back to reasonable levels once it is fully shut down.
Step #3: Generate some High Difficulty Passwords that PiratePay will use:
SSH into your servers non-root user
Generate three High Difficulty Passwords using this command three times:
openssl rand 60 | openssl base64 -A
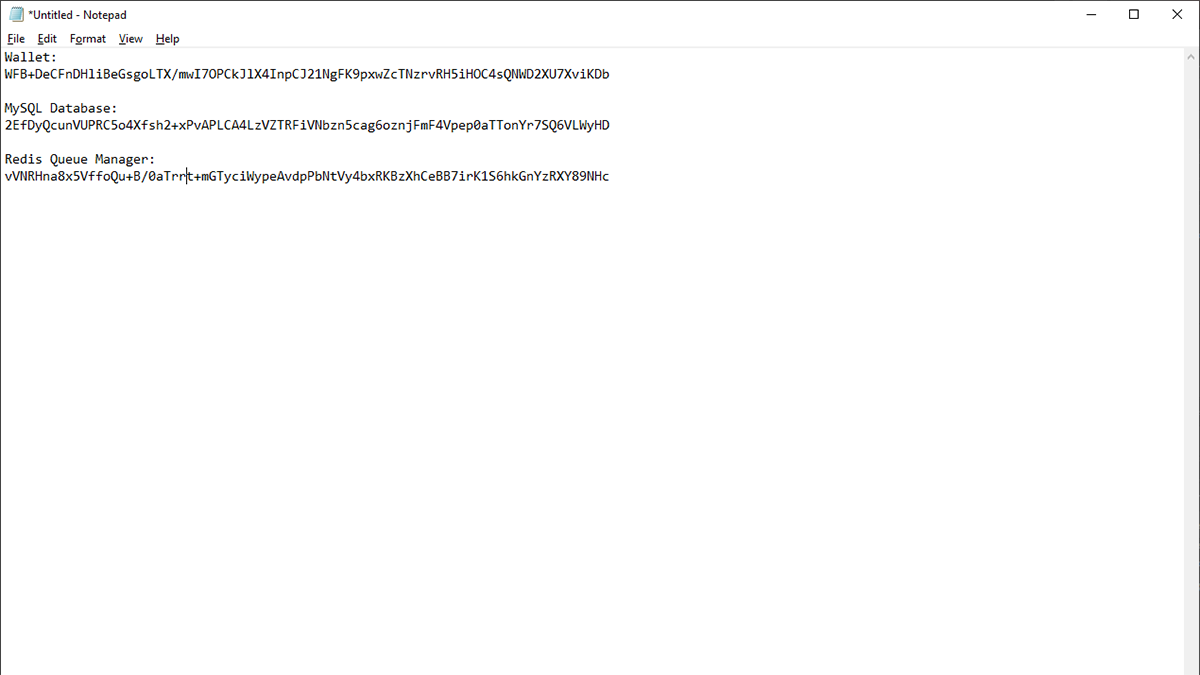
Open a Notepad Editor and save the three passwords you received similar to below for later use:
Wallet:
WFB+DeCFnDHliBeGsgoLTX/mwI7OPCkJlX4InpCJ21NgFK9pxwZcTNzrvRH5iHOC4sQNWD2XU7XviKDb
MySQL Database:
2EfDyQcunVUPRC5o4Xfsh2+xPvAPLCA4LzVZTRFiVNbzn5cag6oznjFmF4Vpep0aTTonYr7SQ6VLWyHD
Redis Queue Manager:
vVNRHna8x5VffoQu+B/0aTrrt+mGTyciWypeAvdpPbNtVy4bxRKBzXhCeBB7irK1S6hkGnYzRXY89NHc
Please Note: For Security Purposes do not reuse the passwords I generated above.
Example Image.Now let's open the PirateChain config file in a text editor:
nano /home/$USER/.komodo/PIRATE/PIRATE.conf
Now we'll change the rpc user to "piratepay" and the password to the Wallet one generated above:
Example:
rpcuser=piratepay
Example:
rpcpassword=WFB+DeCFnDHliBeGsgoLTX/mwI7OPCkJlX4InpCJ21NgFK9pxwZcTNzrvRH5iHOC4sQNWD2XU7XviKDb
Make sure that rpcallowip and rpcbind are both set to localhost, ie: 127.0.0.1
Example:
rpcallowip=127.0.0.1
Example:
rpcbind=127.0.0.1
This is so that it can only be accessed locally ie: inside the server, and not remotely from other users.
Then save the file with: Ctrl + x, Save, Yes.

Step #4: Setting up the LEMP Stack (Linux, Nginx, MySQL, PHP) for the PiratePay App.
SSH into your servers non-root user.
cd
sudo apt-get install nginx
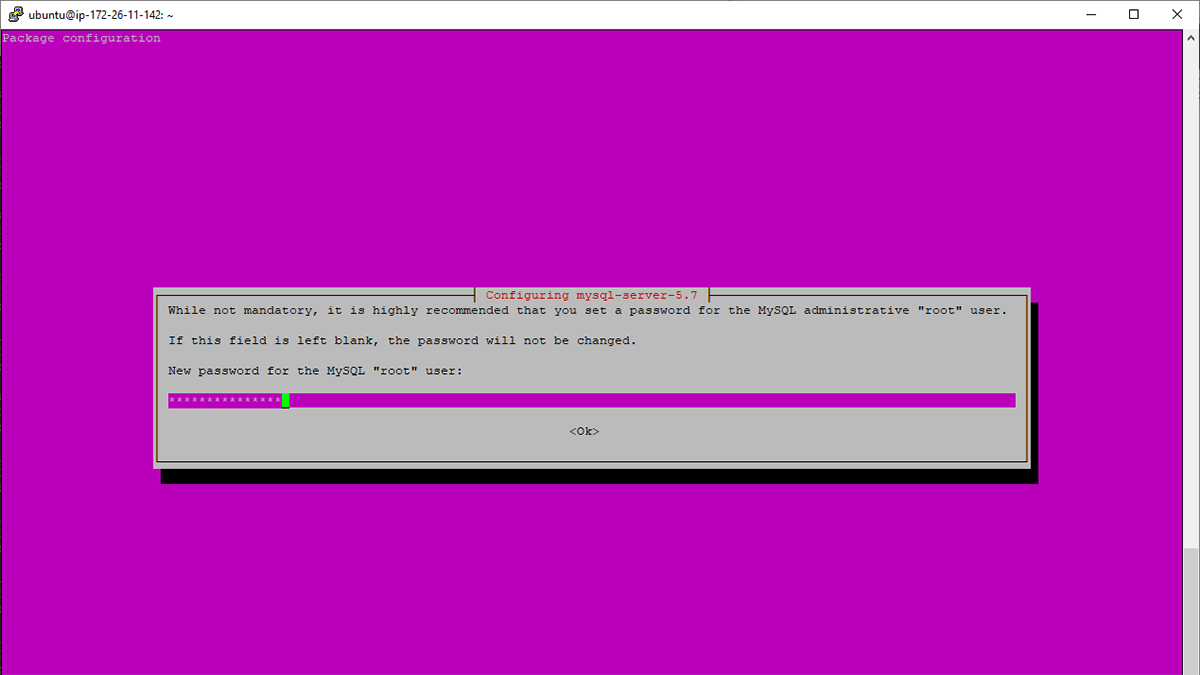
sudo apt-get install mysql-server
When asked, set a Strong Password you will remember for Root access to your MYSQL database. (This will be how you view/access/backup the database.) Example Image.
sudo mysql_secure_installation
Validate Password Plugin. (Optional, but recommended to test your root password quality.)
Remove anonymous users? (yes)
Disallow root login remotely? (yes)
Remove test database and access to it? (yes)
Reload privilege tables now? (yes)
Now we will log into MySQL, Create and Secure the PiratePay Database:
mysql -u root -p
It will ask you for the memerable "Root" Password you created a couple steps ago.
Once logged in, you can use these commands to create the database:
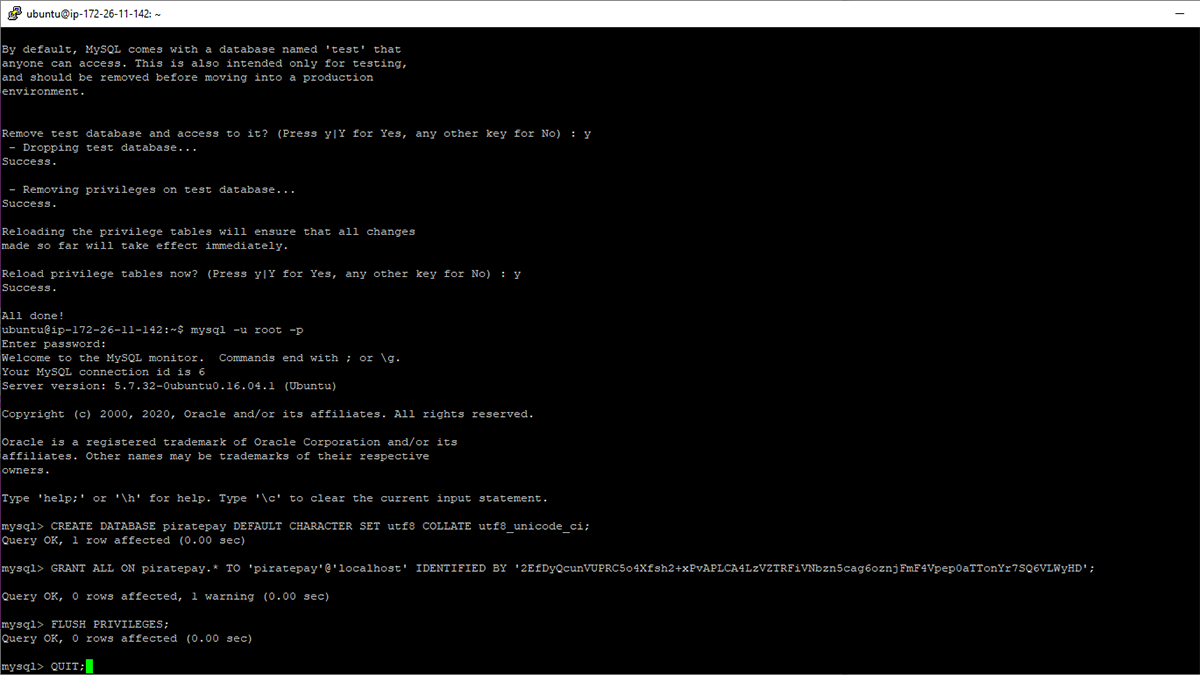
CREATE DATABASE piratepay DEFAULT CHARACTER SET utf8 COLLATE utf8_unicode_ci;
Here we are going to need the Strong "MySQL Database" Password I had you save to the notepad earlier:
Remove my password at the end of the command below and put the "MySQL Database" password you generated in your notepad inside the single quotes ' ' (Apostrophes) after IDENTIFED BY: Example Image.
(Replace my password that is in red with yours.)
GRANT ALL ON piratepay.* TO 'piratepay'@'localhost' IDENTIFIED BY '2EfDyQcunVUPRC5o4Xfsh2+xPvAPLCA4LzVZTRFiVNbzn5cag6oznjFmF4Vpep0aTTonYr7SQ6VLWyHD';
Now we'll flush the old settings and exit:
FLUSH PRIVILEGES;
QUIT;
Now that we got that setup, we'll use these commands to install PHP:
sudo apt-get install software-properties-common
sudo add-apt-repository ppa:ondrej/php
sudo apt-get update
sudo apt-get install php7.3 php7.3-fpm php7.3-mysql php7.3-mbstring php7.3-imagick php7.3-xml php7.3-bcmath php7.3-intl php7.3-zip
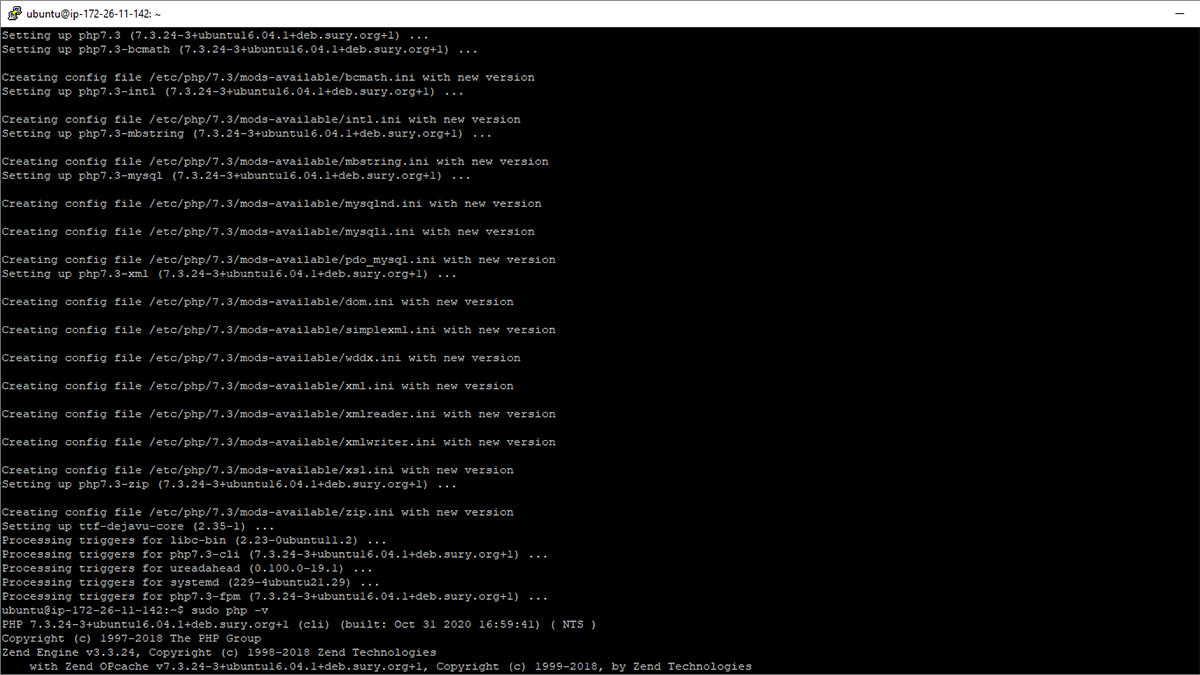
To check if PHP 7.3 properly installed: Example Image.
sudo php -v
It will display PHP 7.3.something if it correctly installed.
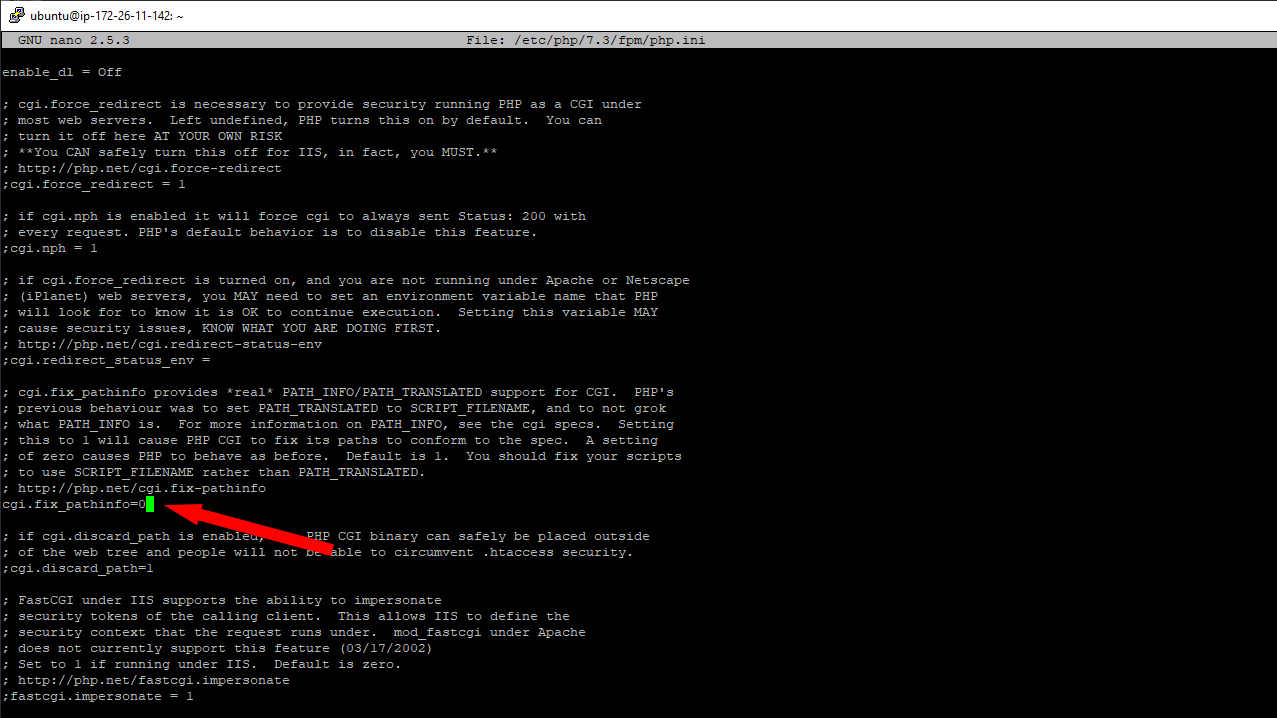
After you verify version, let's fix one setting in the PHP's .ini file:
sudo nano /etc/php/7.3/fpm/php.ini
Press Ctrl + W
Search for the following:
cgi.fix_pathinfo=
Uncomment by removing the ; from the start. Change the pathinfo value from 1 to 0 Example Image.
Example:
cgi.fix_pathinfo=0
Ctrl + X, Save, Yes.
sudo systemctl restart php7.3-fpm
Now we'll setup the nginx settings file:
sudo nano /etc/nginx/sites-available/default
Locate:
root var/www/html;
Change it to: Example Image.
root /var/www/PiratePay/public;
Now we need to add "index.php" to the index list. Put it in the second position right after "index": Example Image.
index index.php index.html index.htm index.nginx-debian.html;
Now we'll change the Server Name to your Server IP or connected Domain Name: Example Image.
In the example below change 11.111.1.111 to your servers Public IP.
server_name 11.111.1.111;
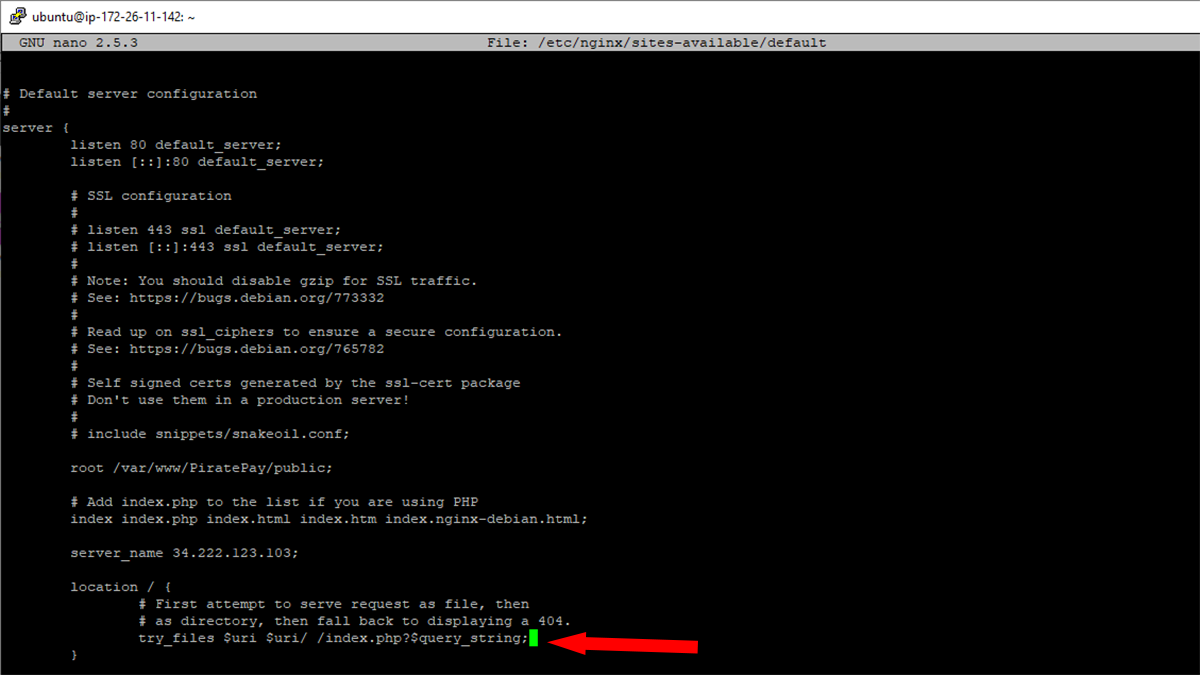
In the "location" section of the nginx config file:
Locate:
try_files $uri $uri/ =404;
Change it to: Example Image.
try_files $uri $uri/ /index.php?$query_string;
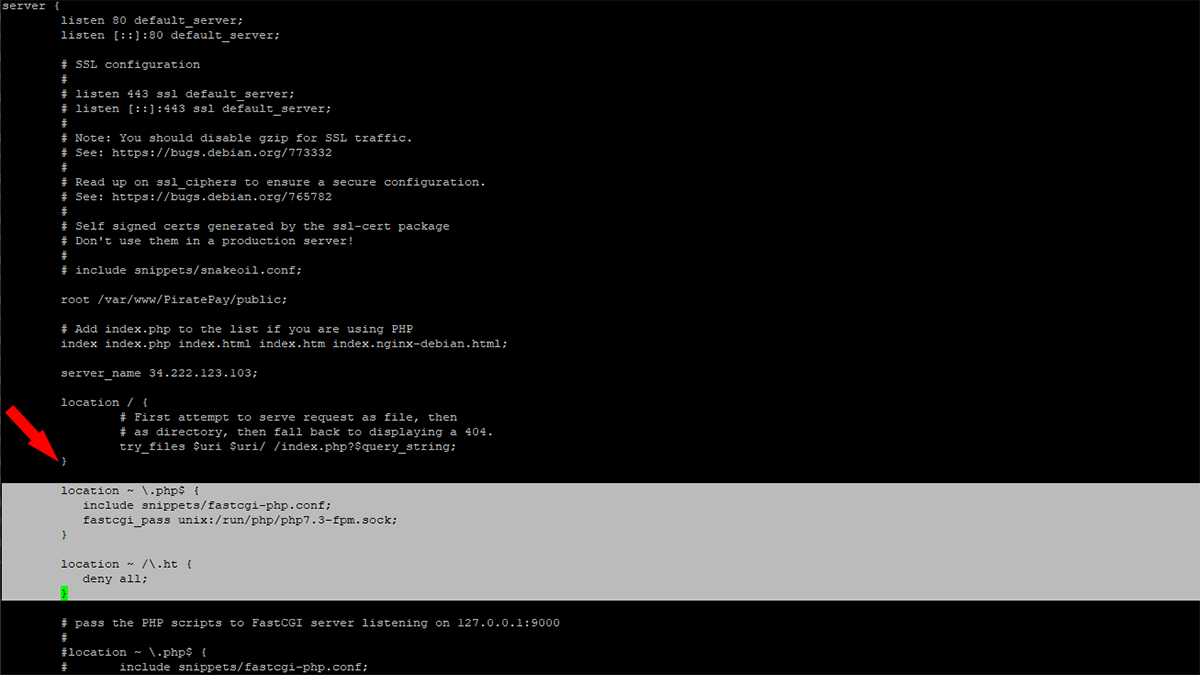
Then right below that, after the end bracket "}" for the "location / {" section.
Paste these. Example Image.
include snippets/fastcgi-php.conf;
fastcgi_pass unix:/run/php/php7.3-fpm.sock;
}
location ~ /\.ht {
deny all;
}
Now to save and exit press: Ctrl + X Save, Yes.
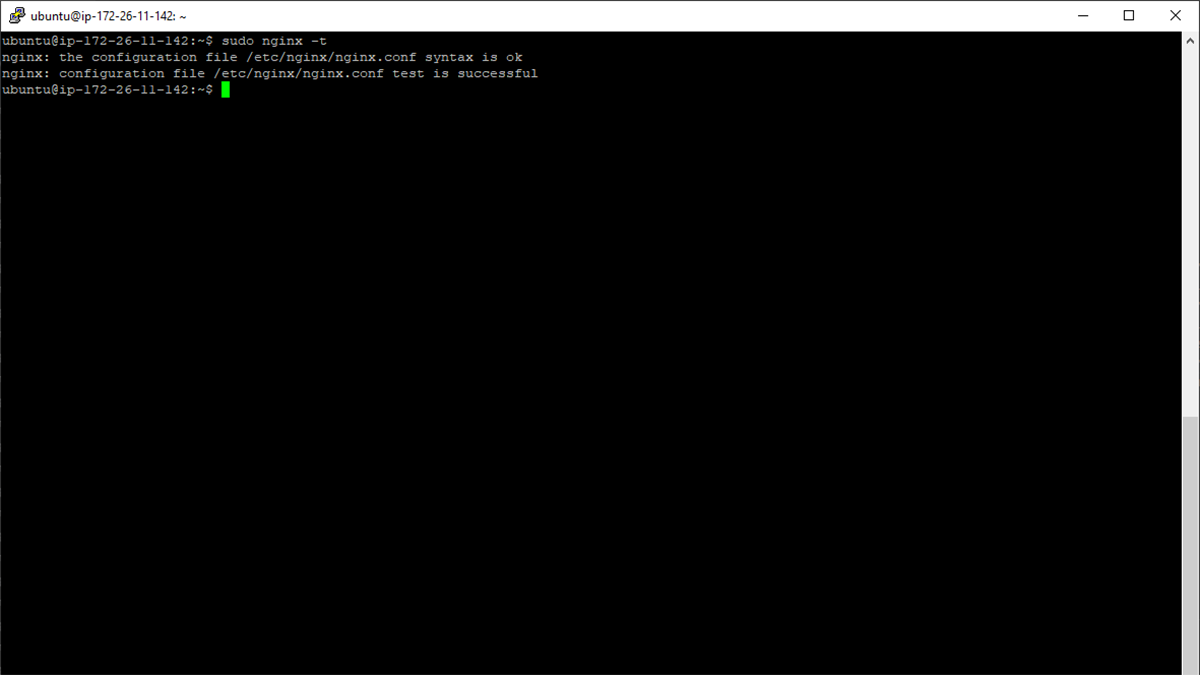
Check if file has errors: Example Image.
sudo nginx -t
Restart Nginx with the new settings:
sudo systemctl reload nginx

Step #5: Installing Redis Queue Manager and Supervisor.
SSH into your non-root user.
Use this command to install Redis and Supervisor:
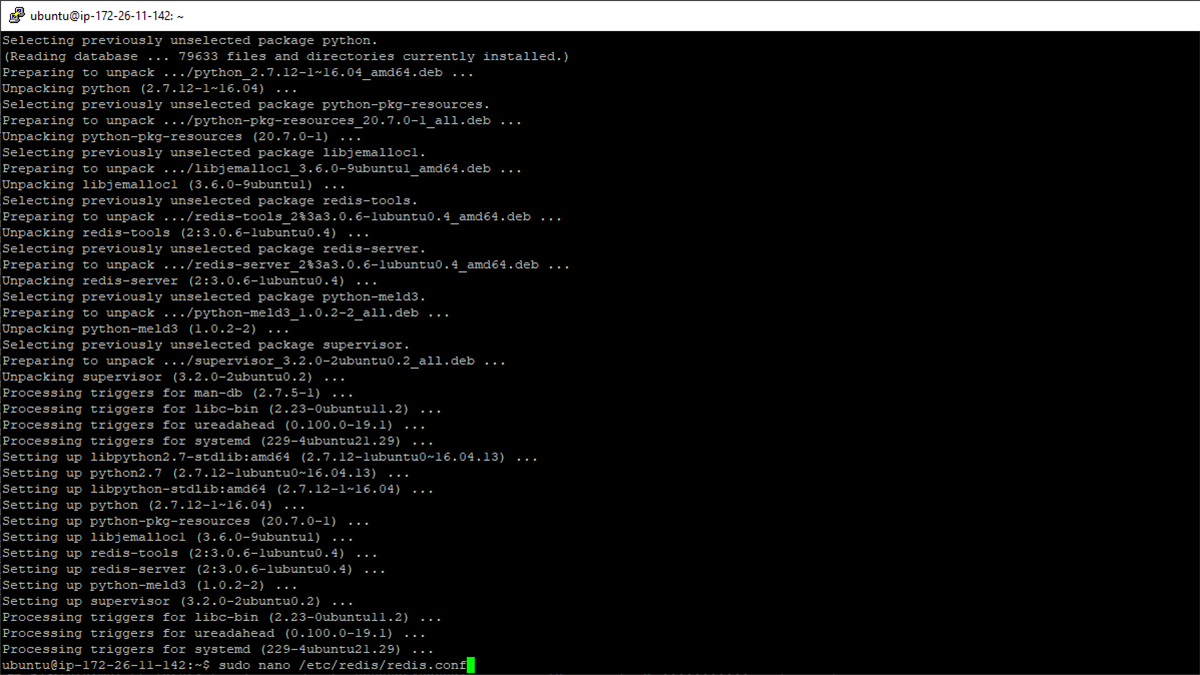
sudo apt-get install git redis-server supervisor
Now we'll edit the "bind" in Redis's config file to allow only local access: Example Image.
sudo nano /etc/redis/redis.conf
Press Ctrl + W to open search.
Search for the following:
bind
At the bottom of that section you should see bind 127.0.0.1 make sure it's there and make sure it doesn't have # in front of it.
bind 127.0.0.1
Press Ctrl + W to open search again.
Search for the following:
requirepass foobared
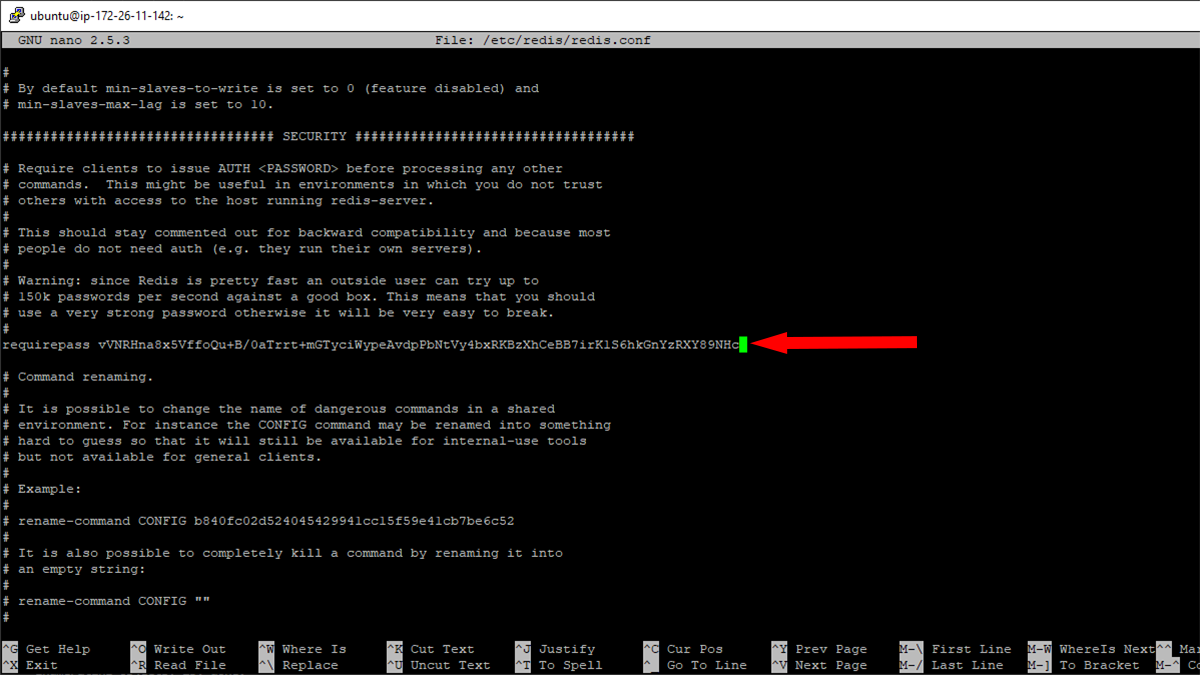
Remove the comment # from in front of requirepass, remove the word "foobared" after it, then add the "Redis Queue Manager" password you saved to your notepad earlier: Example Image.
(Replace my password that is in red with yours.)
requirepass vVNRHna8x5VffoQu+B/0aTrrt+mGTyciWypeAvdpPbNtVy4bxRKBzXhCeBB7irK1S6hkGnYzRXY89NHc
Ctrl + X Save, Yes
Now restart Restart Redis:
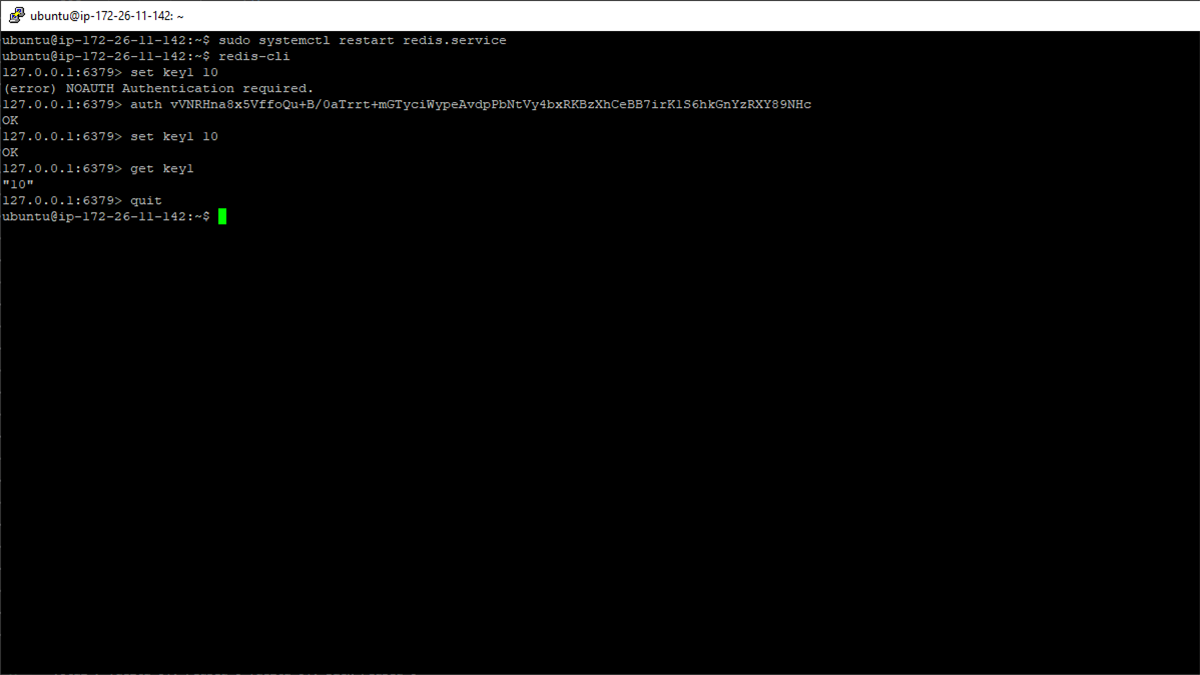
sudo systemctl restart redis.service
Test Redis to make sure there are no errors:
redis-cli
set key1 10
You should get a NOAUTH error, this is because you set the password in the requirepass section previously.
To enter your password type the word auth, followed by the "Redis Queue Manager" password from your notepad.
(Replace my password that is in red with yours.)
auth vVNRHna8x5VffoQu+B/0aTrrt+mGTyciWypeAvdpPbNtVy4bxRKBzXhCeBB7irK1S6hkGnYzRXY89NHc
If the password is correct, it should return OK.
Now test by typing: Example Image.
set key1 10
get key1
If it returns "10" then your test is complete, you have verified Redis is properly working, and is password protected.
You can now exit.
quit
Step #6: Installing the PiratePay Payment Gateway Application.
SSH into your non-root user.
Now we'll install Composer to handle the installation:
cd
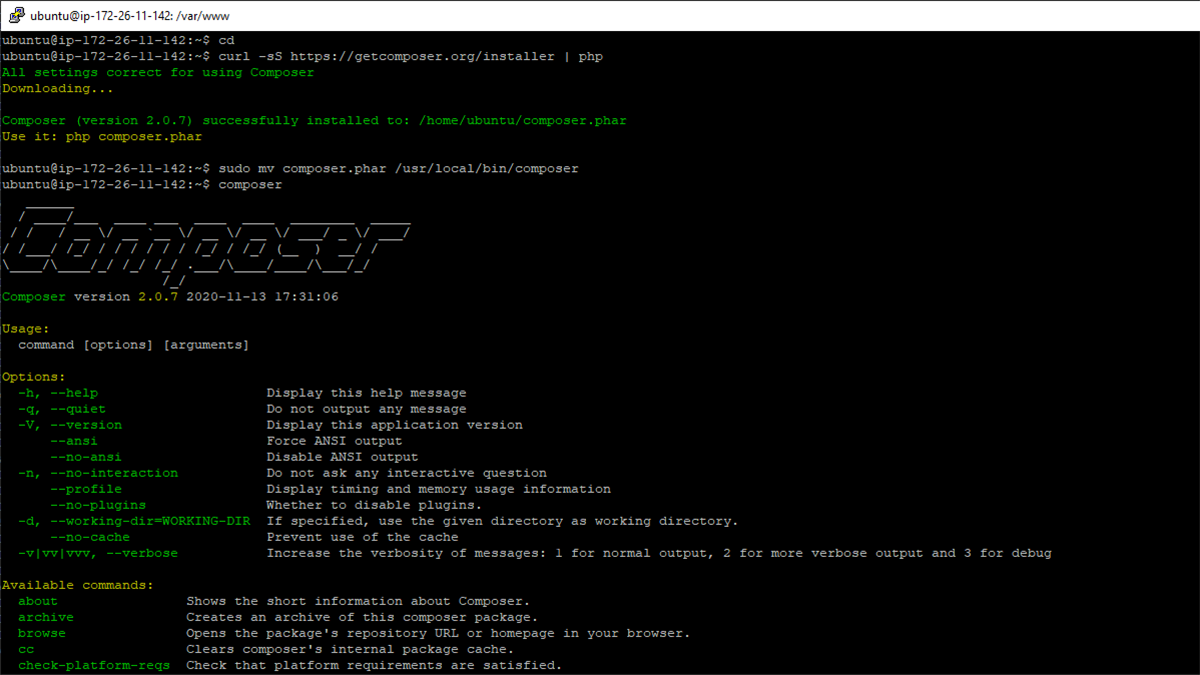
curl -sS https://getcomposer.org/installer | php
sudo mv composer.phar /usr/local/bin/composer
Now to test Composer we'll use: Example Image.
composer
if you get "does not exist", just restart the server. (Make sure the wallet is fully shut down beforehand)
sudo shutdown -r 0
Once, it starts back up, use the "composer" command again, if you get a Available Commands list, it is properly working.
Now we'll change to the www directory, and download PiratePay:
cd /var/www
sudo git clone https://github.com/CryptocurrencyCheckout/PiratePay.git
cd PiratePay
Here we'll setup Supervisor to make sure Horizon Queue Monitor stays running:
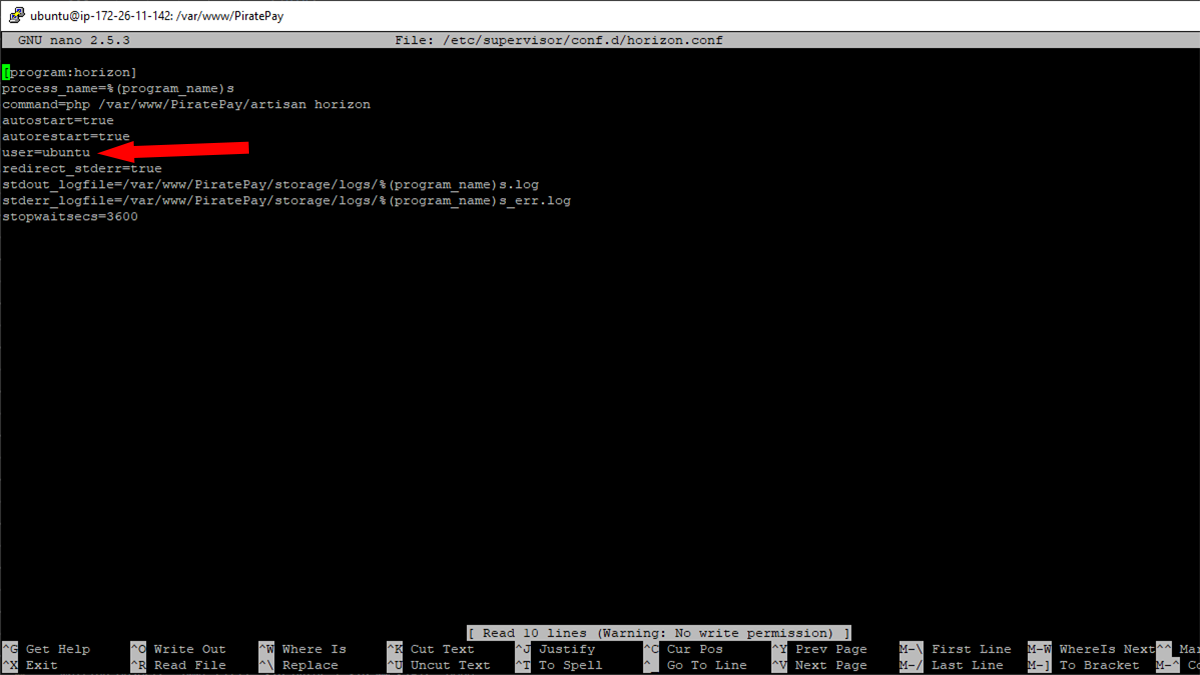
nano horizon.conf
Change Username to your servers Non-Root user name. (The non Root user you are logged into right now.) (example: ubuntu) Example Image.
user=ubuntu
Ctrl + X Save, Yes
Now we'll move the saved file into the supervisor folder.
sudo mv horizon.conf /etc/supervisor/conf.d/horizon.conf
Now we'll test the Supervisor settings:
sudo supervisorctl reread
It should say "Horizon is available". If it does use these commands to update and start horizon in Supervisor:
sudo supervisorctl update
sudo supervisorctl start horizon
Now let's change to file/folder permissions of the PiratePay App, Note that I have the user set to "ubuntu":
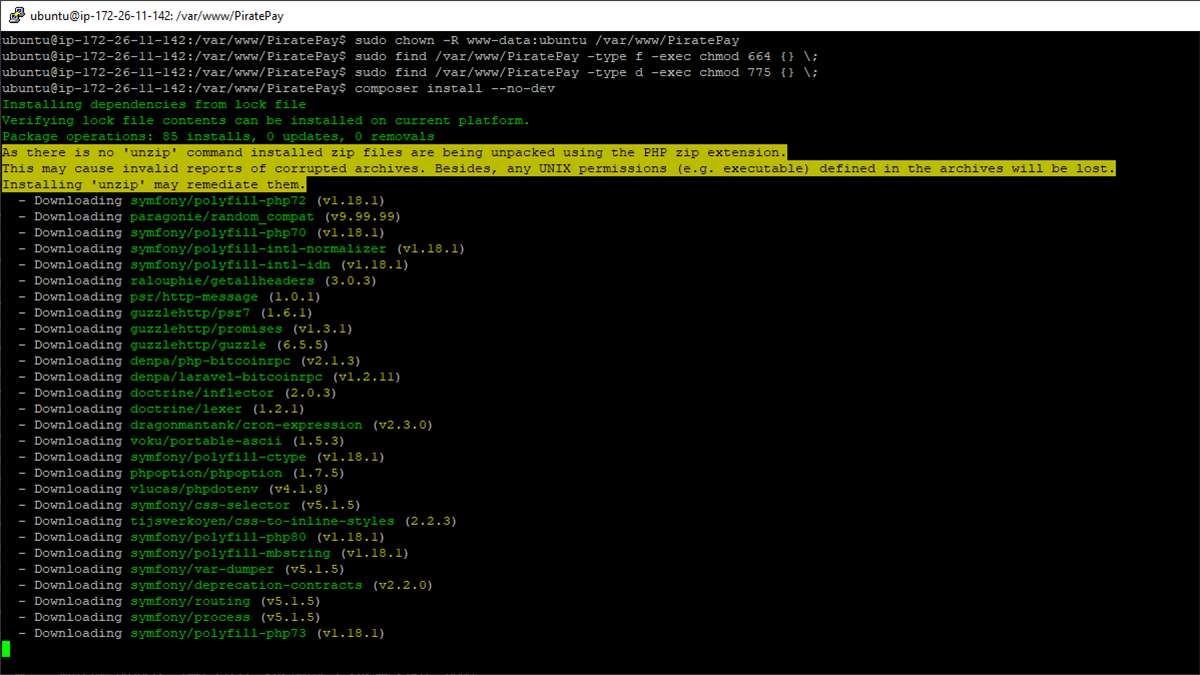
sudo chown -R www-data:ubuntu /var/www/PiratePay
sudo find /var/www/PiratePay -type f -exec chmod 664 {} \;
sudo find /var/www/PiratePay -type d -exec chmod 775 {} \;
Now we'll use Composer to install all the files we need: Example Image.
composer install --no-dev
Let's create and set up the Enviroment file containing all the details we've got so far.
cp .env.example .env
nano .env
Insert your PiratePay App's Domain Name or Public IP into APP_URL section:
In the example below change 11.111.1.111 to your servers Public IP.
APP_URL=11.111.1.111
Insert the "Wallet" Password I had you save to your Notepad earlier into the PIRATE_PASSWORD Section: Example Image.
(Replace my password that is in red with yours.)
PIRATE_PASSWORD=WFB+DeCFnDHliBeGsgoLTX/mwI7OPCkJlX4InpCJ21NgFK9pxwZcTNzrvRH5iHOC4sQNWD2XU7XviKDb
Insert the "MySQL Database" Password I had you save to your Notepad earlier into the DB_PASSWORD Section: Example Image.
(Replace my password that is in red with yours.)
DB_PASSWORD=2EfDyQcunVUPRC5o4Xfsh2+xPvAPLCA4LzVZTRFiVNbzn5cag6oznjFmF4Vpep0aTTonYr7SQ6VLWyHD
Insert the "Redis Queue Manager" Password I had you save to your Notepad earlier into the REDIS_PASSWORD Section: Example Image.
(Replace my password that is in red with yours.)
REDIS_PASSWORD=vVNRHna8x5VffoQu+B/0aTrrt+mGTyciWypeAvdpPbNtVy4bxRKBzXhCeBB7irK1S6hkGnYzRXY89NHc
Ctrl + X Save, Yes
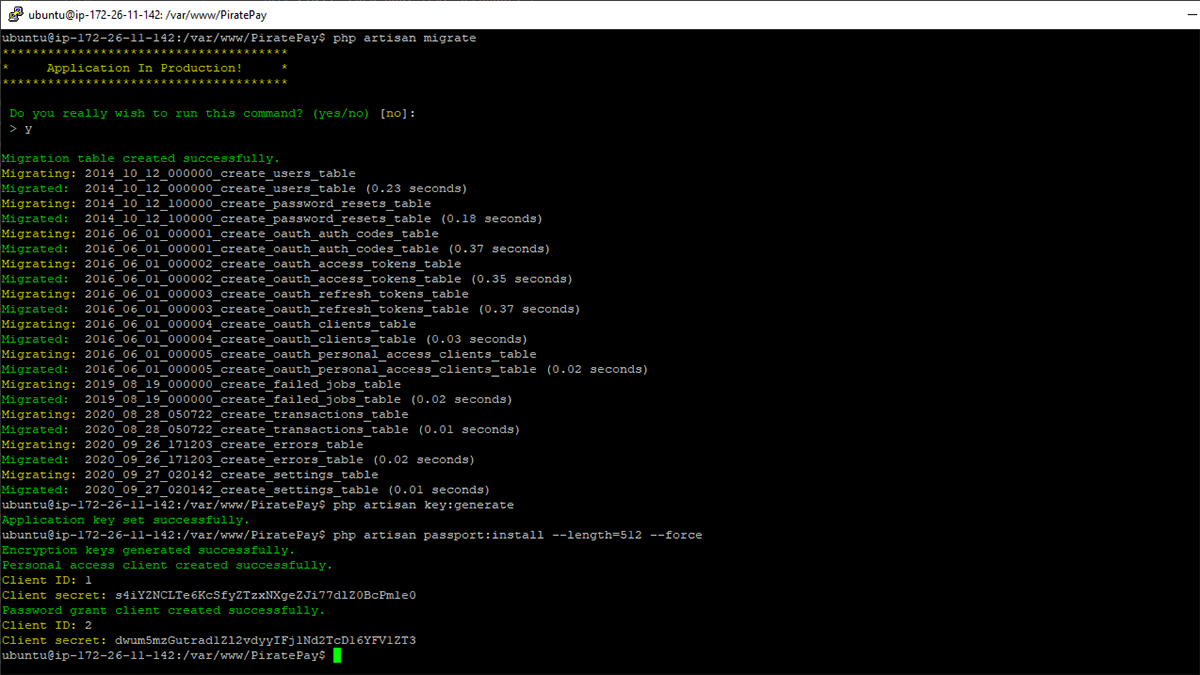
Now we'll use some commands so PiratePay will automatically create all of its own Database Entries, as well as generate our platforms encryption keys: Example Image.
php artisan migrate
php artisan key:generate
php artisan passport:install --length=512 --force
If all was successful, PiratePay is now installed and ready to go.
Let's start the Komodo/PirateChain wallet back up.
cd
/home/$USER/komodo/komodod -ac_name=PIRATE -ac_supply=0 -ac_reward=25600000000 -ac_halving=77777 -ac_private=1 &
Let it boot up and sync all the latest blocks.

Step #7: Accessing your PiratePay App and Testing:
SSH into your server and Restart the wallet by using the following commands.
cd
cd komodo
./komodod -ac_name=PIRATE -ac_supply=0 -ac_reward=25600000000 -ac_halving=77777 -ac_private=1 &
Now that PiratePay is fully installed and the Pirate Wallet is started, you can now go into your browser and go to the Public IP address of your server.
(Or Domain Name if you chose to buy a domain name for it.)
It should now load the PiratePay Application.
Immediately click Register and create your admin dashboard account. (Use a secure password.)
To test Redis: Click the "Queue" tab, the Status shoud say "Active".
To test the Wallet: Click the Wallet tab, the Status should indicate it is running. if Errors show the wallet might now be started or fully synced yet.
If no errors show, Congratulations, your PiratePay app is installed and ready to connect to your website/store!
Adding SSL Encryption between PiratePay and your Store:
Now that we have confirmed the PiratePay app is fully operational, it is highly recommended that you add SSL Encryption (HTTPS) so that all communication between PiratePay and your Store/Website is fully encrypted. This encryption will prevent an attacker from sniffing out order details or Ouath Credentials that are being transferred between the two connections.
There are several ways to go about setting up an SSL, here are a few examples:
- - Setup PiratePay as a subdomain of your primary website/store. Example Address: piratepay.yourwebsite.com
- - Buy a cheap domain name for your PiratePay server, and then get a SSL Certificate from a Certificate Authority,
- - Generate a self signed certificate and connect it to your servers ip address. This option is free, but will lead to browser warnings when trying to access your server.
Option One: - This would be my recommendation as it's easy and free since you already own a domain for your store. You can setup PiratePay as a subdomain on your primary site by simply forwarding the A-Record of your Domain Names DNS to your PiratePay's IP address. Then simply using certbot to automatically generate and install a free Let's Encrypt Certificate for that subdomain. Click here for the installation guide for Option #1.
Available PiratePay Plugin Installation Guides: