Ads keep our service free · We don't endorse advertised products.
Ads keep our service free · We don't endorse advertised products.
How to Create and Share your own Cryptocurrency Invoices.
- Table of Contents:
- Introduction - Accepting Cryptocurrencies with Invoices.
- Why Accept Cryptocurrencies for your products or services?
- What are the Benefits of using CryptocurrencyCheckout?
- Step 1: Create a CryptocurrencyCheckout Connection.
- Step 2: Generate an API Key and start creating your invoice.
- Step 3: Fill out the invoice and pricing information.
- Testing, Finishing Up and Marking Payments as Received.
Introduction - Accepting Cryptocurrencies with Invoices.
In this article we are going to show you how you can easily create a Crypto invoice which includes a link that you can share through email, socials, messengers and almost anywhere online so that you can start getting paid for your products or services with cryptocurrencies like Bitcoin, Litecoin, Ethereum and more, even if you don't have your own website.
Why Accept Cryptocurrencies for your products or services?
Less Risk – Cryptocurrencies like Bitcoin cannot be charged back. This means no hefty chargeback fees, Penalties, suspended accounts or fraudulent transactions to deal with. (This is especially beneficial when selling Digital goods where most payment services offer little to no chargeback protection.)
Larger Transactions – Market Research has shown that people with Cryptocurrencies are willing to spend more in exchange for the convenience of being able to spend their Cryptocurrencies Directly. (Compared to bargain shopping with Credit/Debit/Cash.)
Larger Audience – Services like PayPal are not available in many Countries, and some people might not have or be able to get access to a bank account or a credit/debit card to make cash based purchases with.
Little Competition – With already over 150 million Bitcoin Wallets created and a large number growing every day, it is clear that there is a lot of people with Cryptocurrencies that are looking to spend, and not a significant amount of Stores or People currently accepting Crypto as a payment method option.
What are the Benefits of using CryptocurrencyCheckout?
No Middleman Fees – We never charge any transaction fees, monthly fees, or service fees.
Stay Decentralized – Be in full control, use any wallet of your choosing. All of your Customers Transactions will go straight from your Customers Personal Wallet to Yours. No third party will ever be in control of your coins, keys, wallets, or charge you fees.
Ease of use – It’s as simple as adding the wallet addresses for all the Cryptocurrencies you want to accept, creating an invoice, and sharing your invoice link with all your customers!
Smooth Checkout Process – We will provide your customers with a smooth checkout process that will let them choose any Cryptocurrency that you accept, provide them with real-time market price conversions so they know exactly how much they are sending you, as well as provide them with multiple sleek options to pay, such as One Click wallet payments for compatible wallets, QR Codes for Mobile Wallets, and even Copy and Paste options for direct from exchange transactions.
Now that we've discussed the benefits of accepting Cryptocurrencies and using CryptocurrencyCheckout. Let's look into how to create an invoice with CryptocurrencyCheckout so you can easily start accepting cryptocurrencies for your products/services.
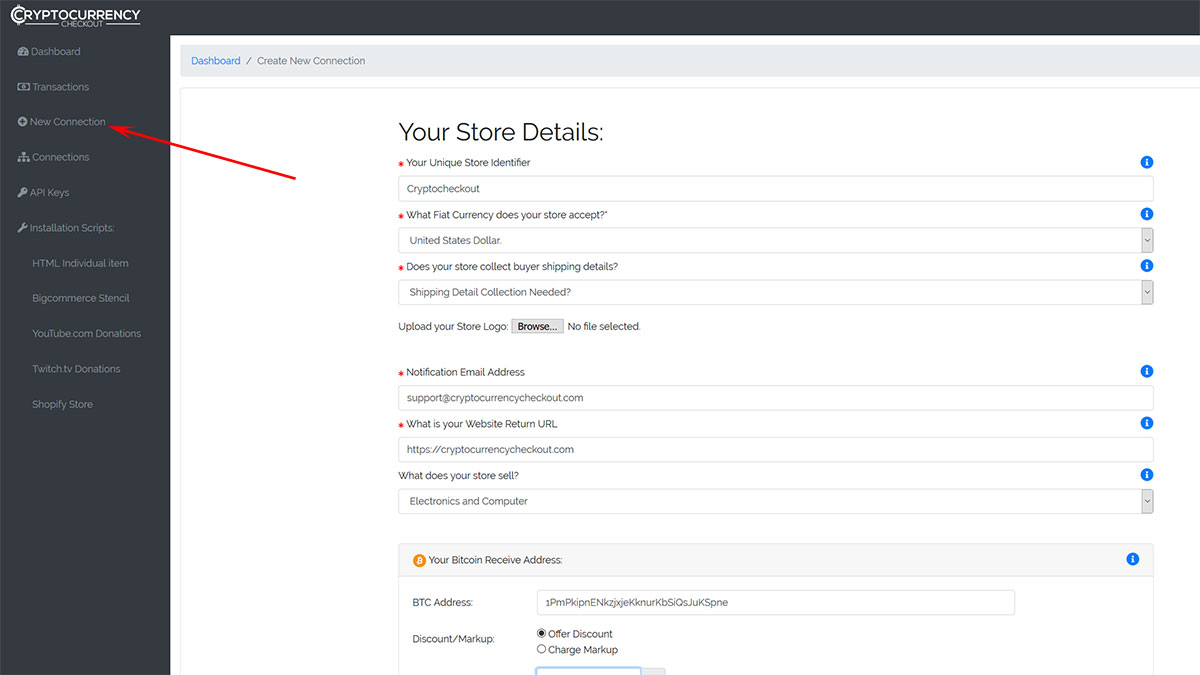
Step 1: Create a CryptocurrencyCheckout Connection.
Log into your CryptocurrencyCheckout.com Dashboard.
Click on the “New Connection” option.
Insert your details. Such as Store or Username, and the fiat currency you want us to calculate from.
Now insert the Wallet Addresses of all the Cryptocurrencies you would like to receive.
If there is any Cryptocurrencies you do not want to accept on your store just leave those sections blank.
Optional: Select if you would like to charge a markup to accept an individual crypto, or offer a store discount.
Optional: You can also view how to use our Market Volatility Protection Tools Here
Click Submit.

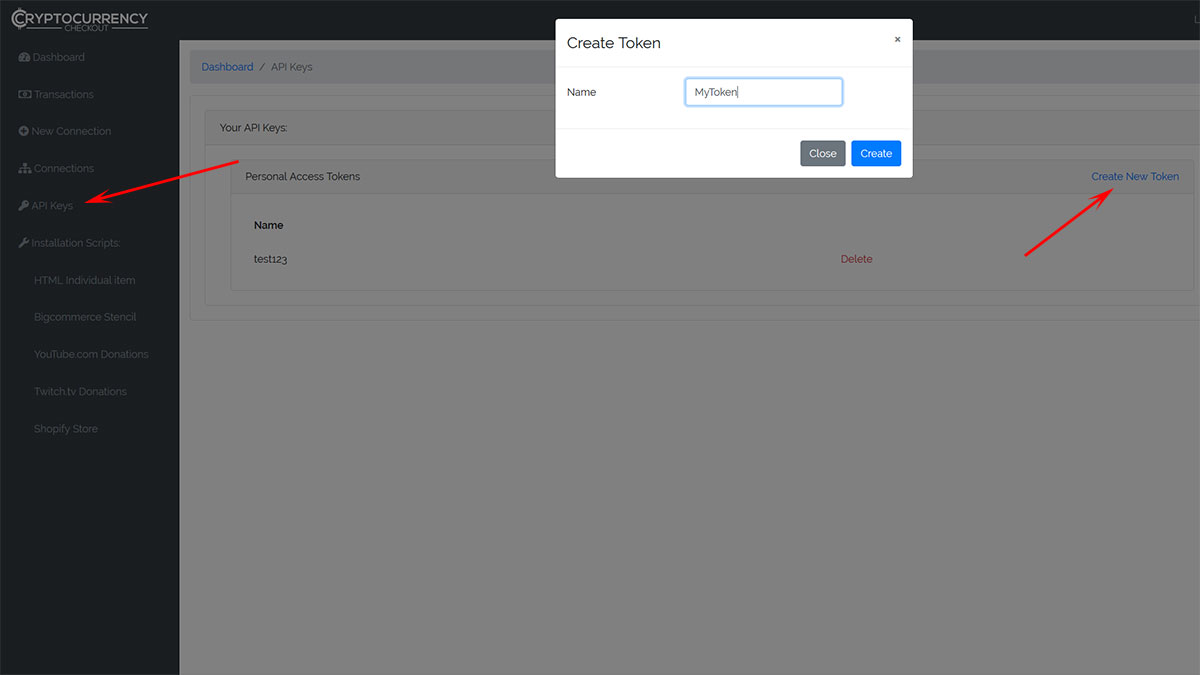
Step 2: Generate an API Key and start creating your invoice.
Log into your CryptocurrencyCheckout.com Dashboard.
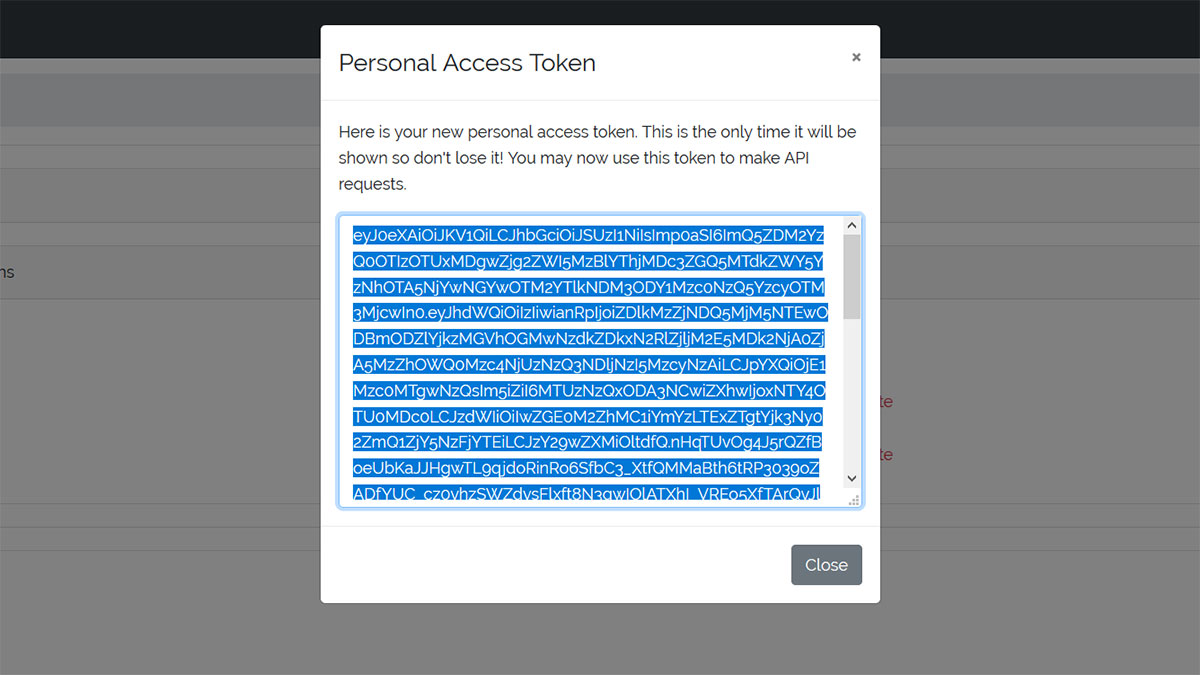
Click “API Keys” and Generate an API key for your Invoice.
Copy and paste the API Key into a notepad, or another text editor for later.
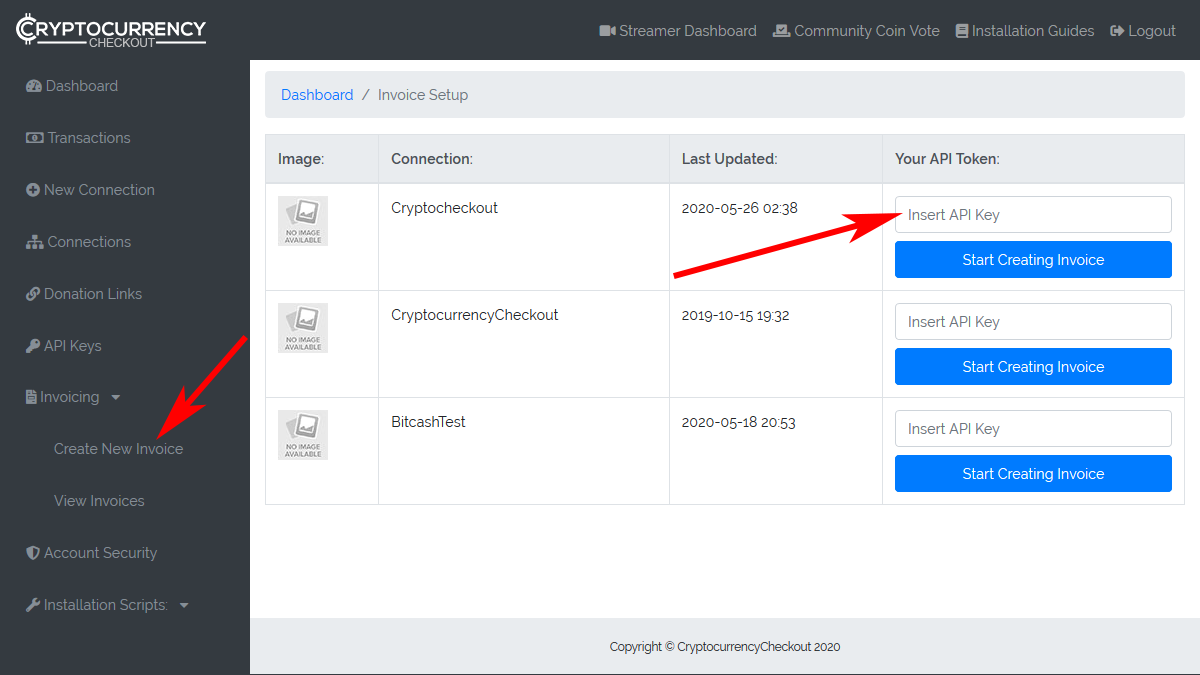
In the dashboard, go to the Invoicing section and select “Create New Invoice”.
Paste the API key you saved earlier into the “Insert API Key” Section.
Click the “Start Creating Invoice” button.

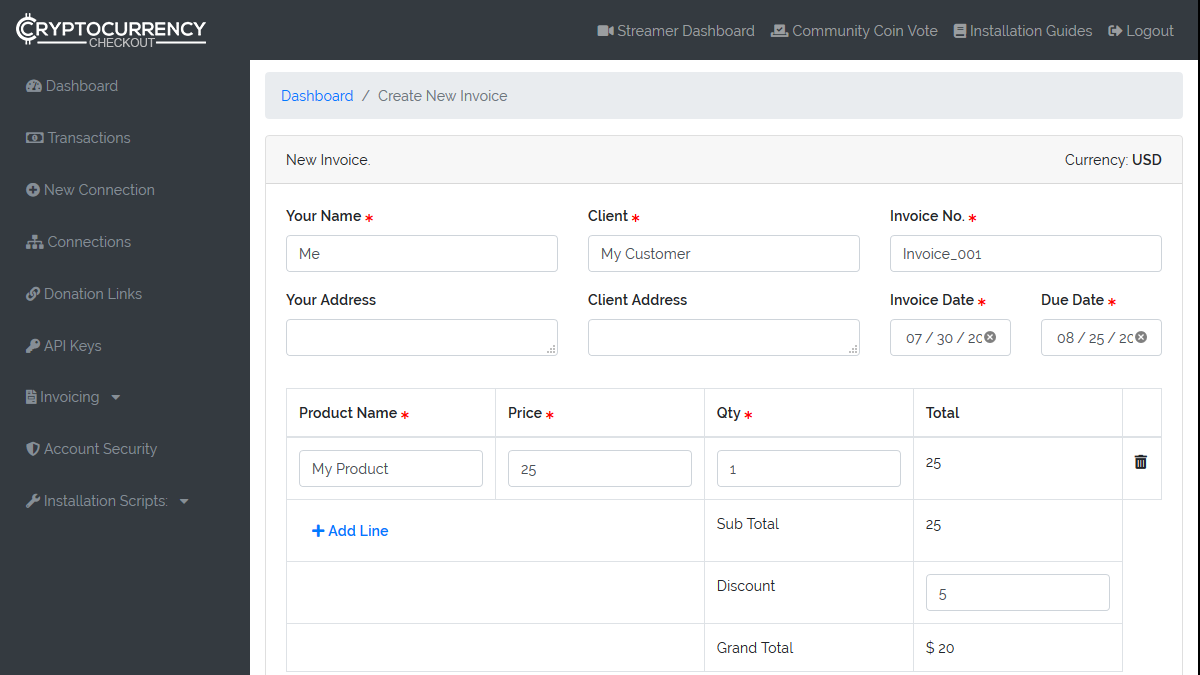
Step 3: Fill out the invoice and pricing information.
Your Name and your Customers Name:
Here you can enter your store name, your user name, alias, or some identifier that your customer would know you by.
Similarly you can enter your client/customers name or alias.
For anonymity you do not have to use your real name.
Invoice Number:
Here you enter an identifying name or number that will help you keep track of your invoices.
You can enter Letters, Numbers, Dashes and Underscores as your Invoice ID.
Addresses:
Optionally you can enter yours and your customers addresses.
For anonymity these fields are not required.
Invoice Date:
Here you can choose the creation date of your invoice, as well as the due by date of your invoice.
Product/Price/Quantity:
List and name your products. if you need more lines just click add line.
Input the price of individual items, and the quantity of each item.
Optionally you can add a discount to your order total.
Please note: Do not use fiat symbols like $, €, £ in pricing.
Shipping Costs:
If you need to charge shipping and want to list it separately, just create a product called "shipping" and enter the shipping cost as the price with a quantity of 1.
Terms and Conditions:
This Optional section can be used to designate specific terms and conditions for the payment, as well as order notes to help you and your customer understand specifics about this payment.
Click the “Create Invoice” button.
Testing, Finishing Up and Marking Payments as Received.
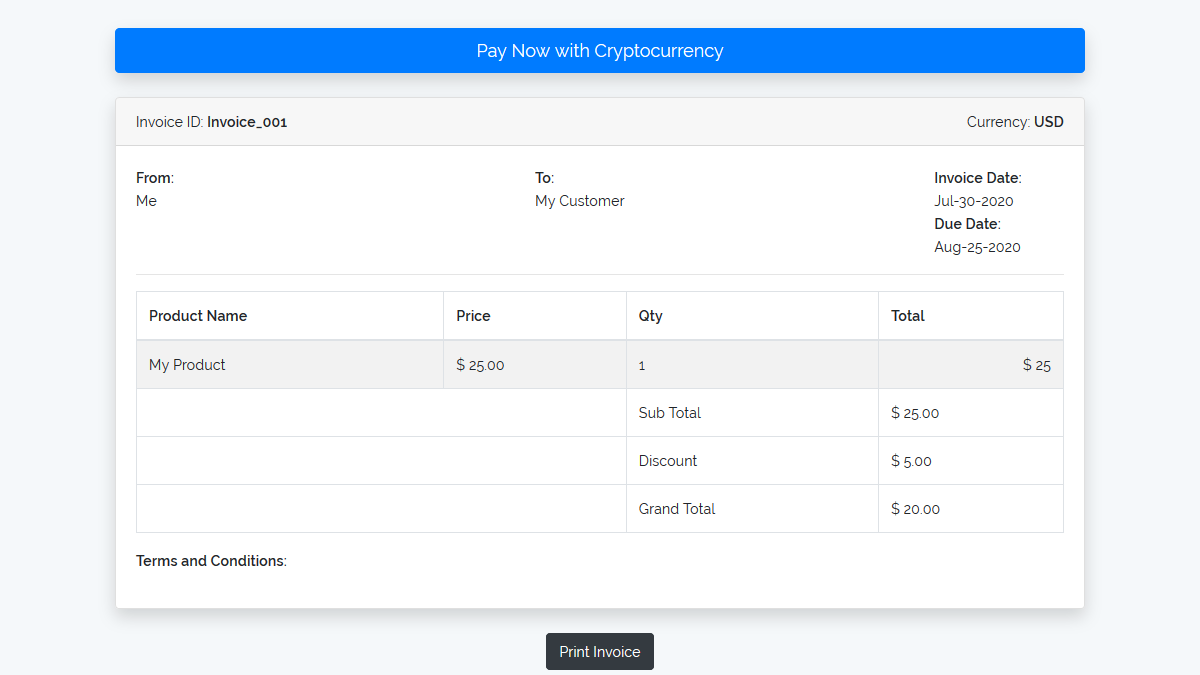
You have successfully generated a Cryptocurrency Checkout Invoice!
Once generated click the “Pay Now with Cryptocurrency” Button just to verify everything is working correctly, and all the coins you want to accept are enabled.
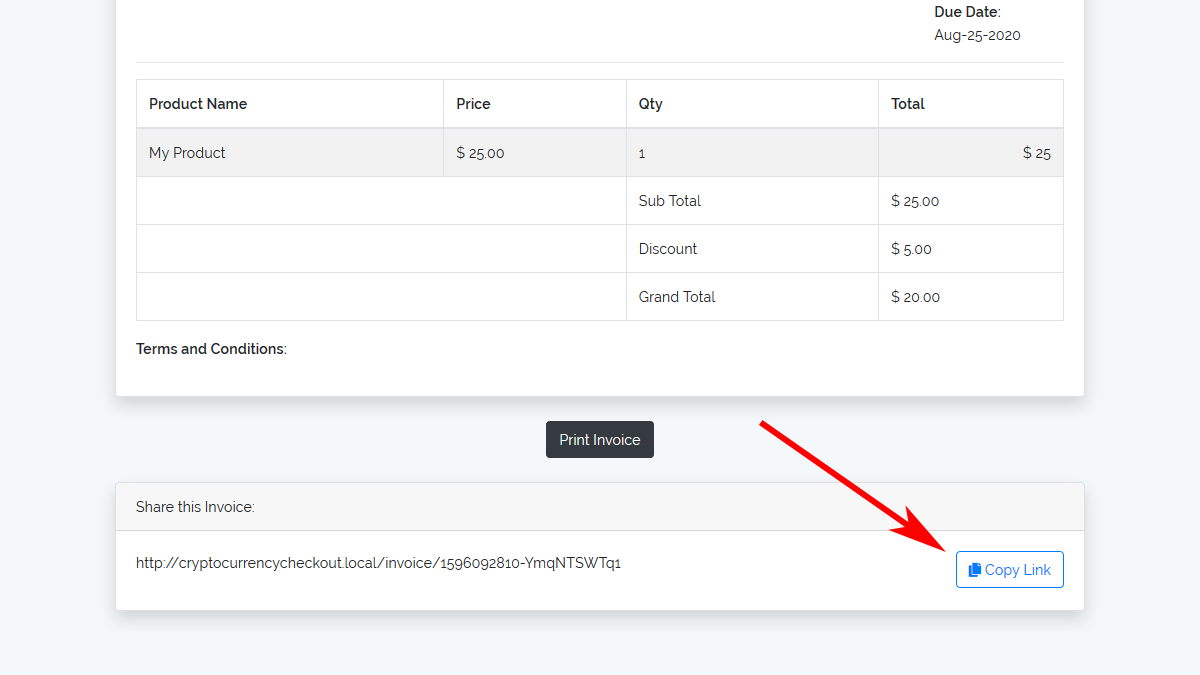
Copy the “Share This Invoice” link from the bottom, you can share it via email, socials, messengers, your website and anywhere else links can be shared.
Once your customer submits the form and makes payment you should receive an email indicating the customer marked the invoice as paid.
Verify the payment has arrived, and process the order/services as you normally would.
If you have any issues feel free to send us a message, or join us on discord.
Ads keep our service free · We don't endorse advertised products.
Ads keep our service free · We don't endorse advertised products.