Ads keep our service free · We don't endorse advertised products.
Ads keep our service free · We don't endorse advertised products.

How to accept Cryptocurrencies on Shopify Stores.
In this article we are going to be discussing the benefits of accepting Cryptocurrencies on Shopify, as well as show you how to integrate the CryptocurrencyCheckout Platform into your Shopify store so that you can start accepting Cryptocurrencies like: Bitcoin, Litecoin, Ethereum, Dash, and many more as payment for your sales.
Why Accept Cryptocurrency In Your Store?
Less Risk – Cryptocurrencies like Bitcoin cannot be charged back. This means no hefty chargeback fees, Penalties, suspended accounts or fraudulent transactions to deal with. (This is especially beneficial when selling Digital goods where most payment services offer little to no chargeback protection.)
Larger Transactions – Market Research has shown that people with Cryptocurrencies are willing to spend more in exchange for the convenience of being able to spend their Cryptocurrencies Directly. (Compared to bargain shopping with Credit/Debit/Cash.)
Larger Audience – Services like PayPal are not available in many Countries, and some people might not have or be able to get access to a bank account or a credit/debit card to make cash based purchases with.
Little Competition – With already over 150 million Bitcoin Wallets created and a large number growing every day, it is clear that there is a lot of people with Cryptocurrencies that are looking to spend, and not a significant amount of Stores or People currently accepting Crypto as a payment method option.
What are the Benefits of using CryptocurrencyCheckout?
No Middleman Fees – We never charge any transaction fees, monthly fees, or service fees.
Stay Decentralized – Be in full control, use any wallet of your choosing. All of your Customers Transactions will go straight from your Customers Personal Wallet to Yours. No third party will ever be in control of your coins, or charging you fees.
Ease of use – It’s as simple as adding all the wallet addresses for all the Cryptocurrencies you want to accept, creating a installation script, and pasting it into your online store, test the connection and you’re set!
Smooth Checkout Process – We will provide your customers with a smooth checkout process that will let them choose any Cryptocurrency that you accept, provide them with real-time market price conversions so they know exactly how much they are sending you, as well as provide them with multiple sleek options to pay, such as One Click wallet payments for compatible wallets, QR Codes for Mobile Wallets, and even Copy and Paste options for direct from exchange transactions.
Now that we've discussed the benefits of accepting Cryptocurrency and using CryptocurrencyCheckout to do so. Let's look into how to integrate CryptocurrencyCheckout into Shopify.
Firstly, Things we want to achieve in this integration:
#1: We would like to maintain all of our orders inside of Shopify’s platform. This includes using Shopify’s checkout process to securely generate an order, collect buyer info, calculate shipping costs, taxes, offer discounts, allow coupon codes, etc.
#2: We would also like to leave the ability for customers to be able to review their past orders, and maintain all order records on our Shopify store itself.
#3: We want the order to stay in “Pending Payment” status until we can manually verify we have received the crypto payment, allowing us to make sure that all confirmations are received on the blockchain before changing the order status to “payment received”.
#4: We want to be able to use our standard Shipping and Bookkeeping integrations for Shopify, without needing any additional plugins or software to add CryptocurrencyCheckout to our store.
Alright, let's get started with the installation.


Shopify Cryptocurrency Checkout Installation
Step 1: Create a CryptocurrencyCheckout payment option in Shopify.
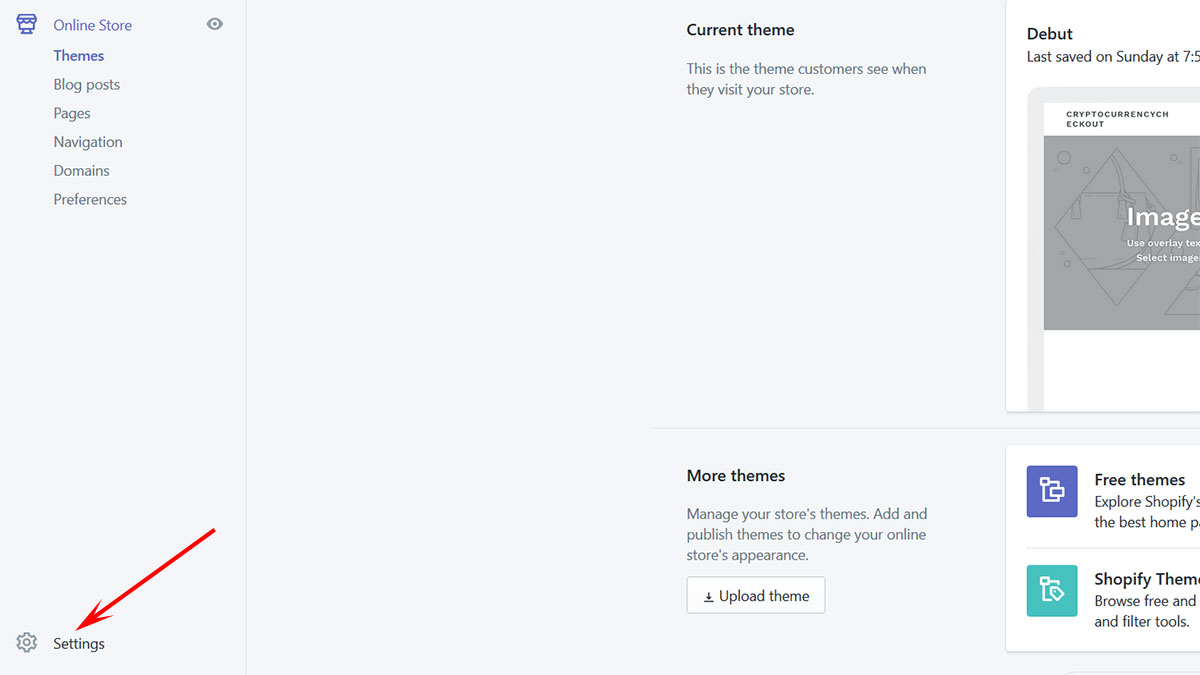
Log into your Shopify Admin Dashboard.
Click on the Settings Gear in the bottom left.
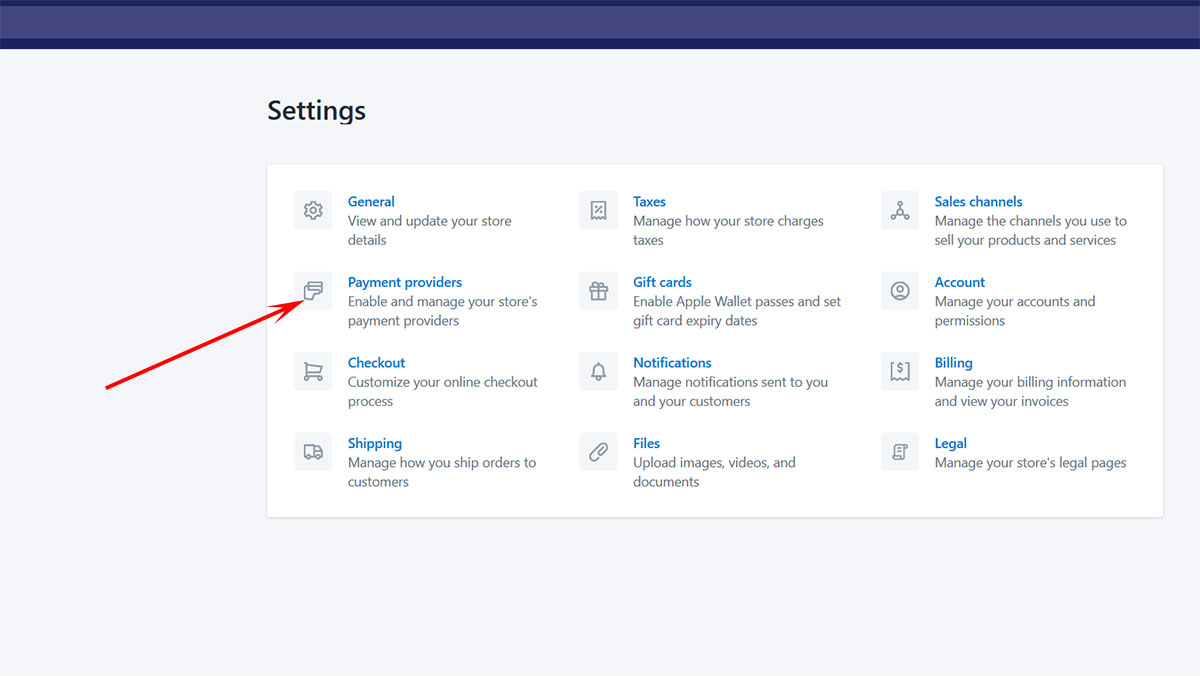
Select “Payment Providers” from the available options.
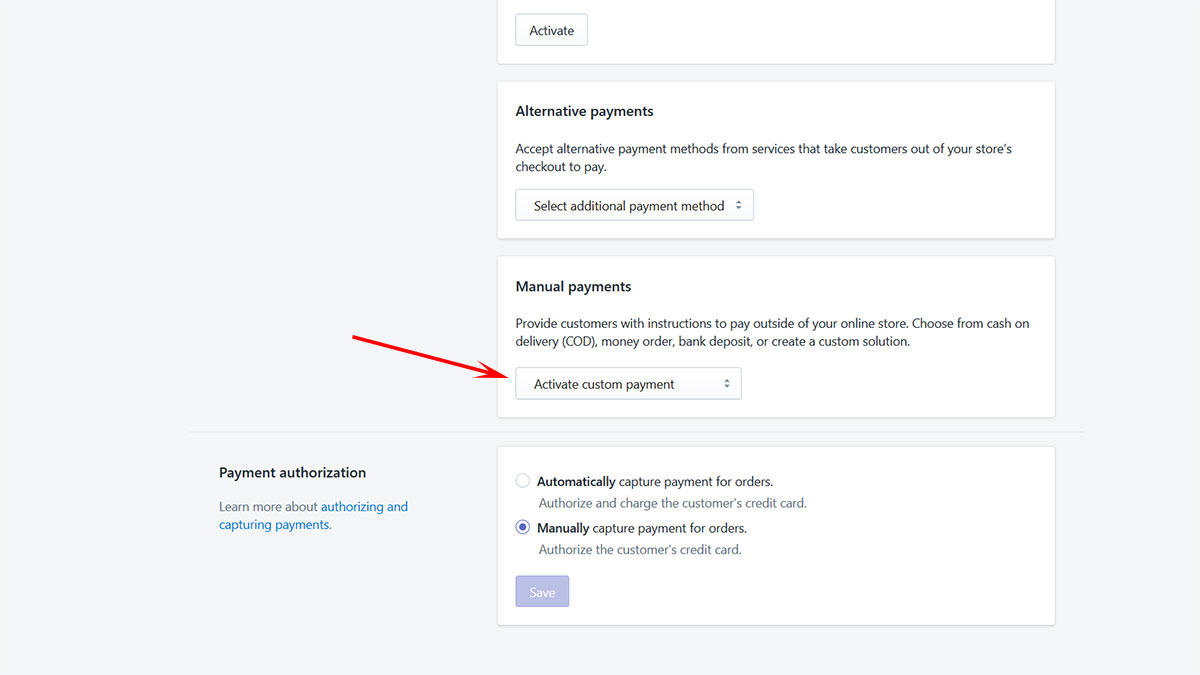
Locate the “Manual Payment Methods” section located near the bottom.
Click on “Create Custom Payment Method”, and fill in the details to fit your stores needs.
Our Example:CryptocurrencyCheckout
Additional details:You can now pay for your order with: Bitcoin, Dash, Litecoin, Ethereum.
Payment instructions:To begin your Cryptocurrency Payment:
Just click the "Pay Now With Cryptocurrency" Button located on the page.
You will be taken to the CryptocurrencyCheckout.com Payment gateway to begin your payment.
Click Activate.

Step 2: Create CryptocurrencyCheckout Connection.
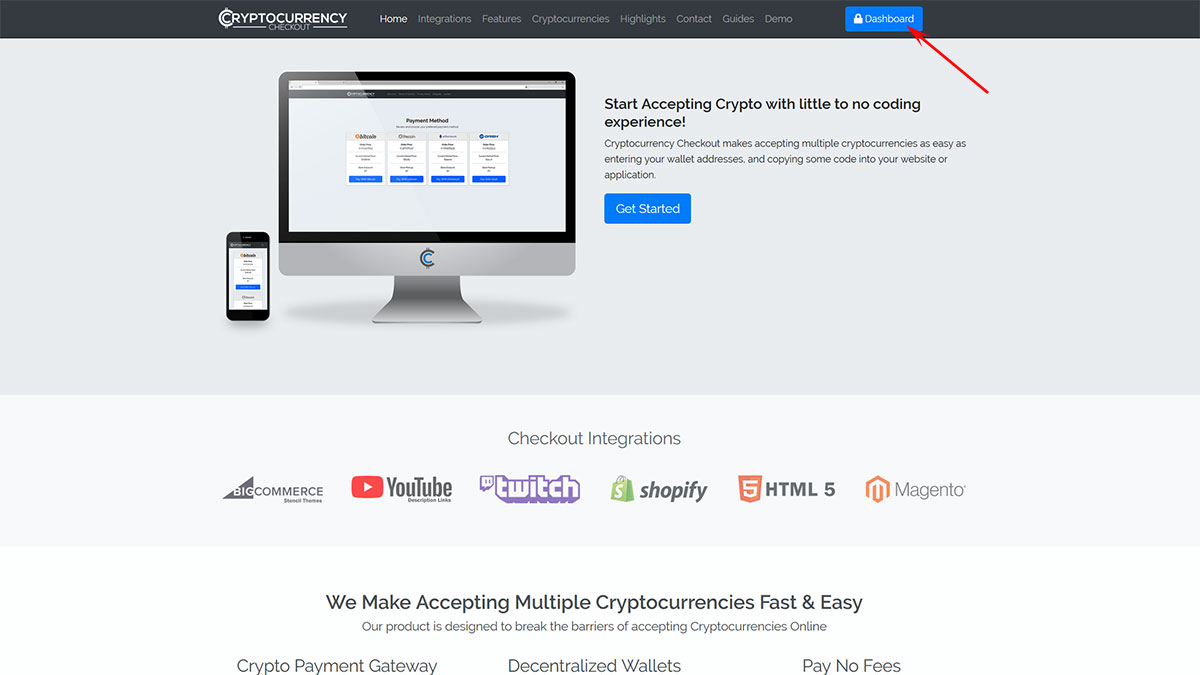
Login to your CryptocurrencyCheckout.com Dashboard.
Click on the “New Connection” option.
Insert your Store details.
Now insert the Wallet Addresses of all the Cryptocurrencies you would like to receive.
If there is any Cryptocurrencies you do not want to accept on your store just leave those sections blank.
Optional: Select if you would like to charge a markup to accept an individual crypto, or offer a store discount.
Optional: You can also view how to use our Market Volatility Protection Tools Here
Click Submit.

Step 3: Generate CryptocurrencyCheckout Script.
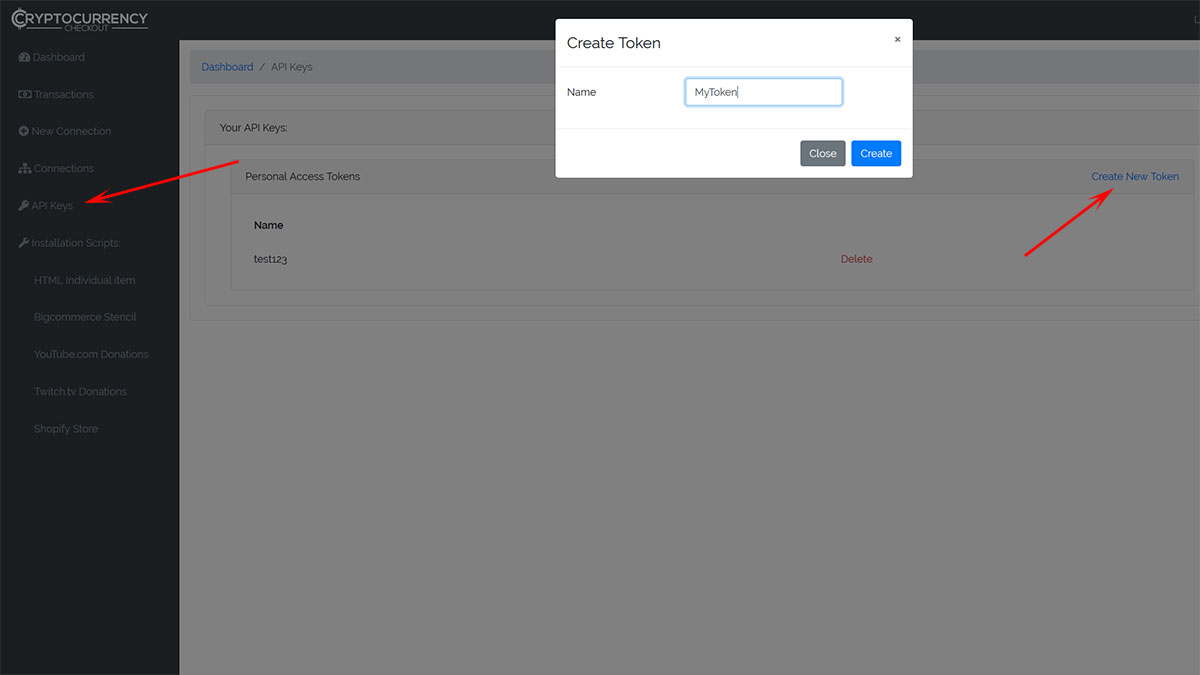
Log into your CryptocurrencyCheckout.com Dashboard.
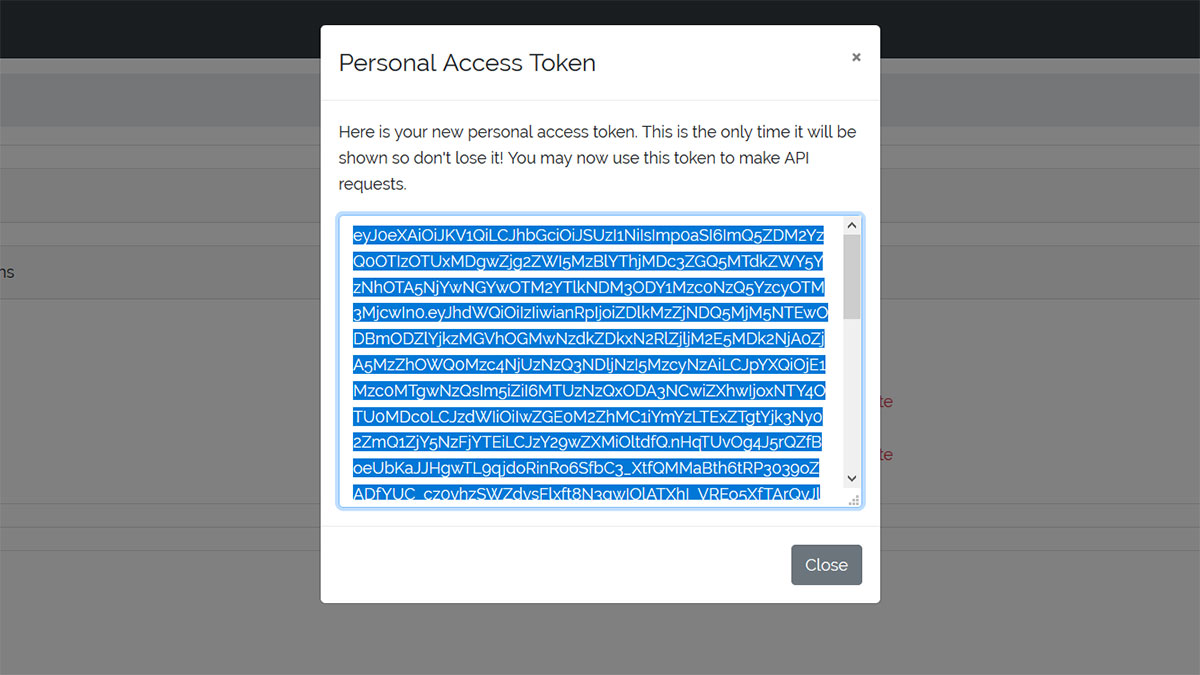
Click “API Keys”, Then Generate an API key for your store.
Copy and paste the API Key into notepad, or another text editor for later.
In the dashboard, go to the Installation Scripts > Store Integrations and select “Shopify Store”
Paste the API key you saved earlier into the “Insert API Key” Section.
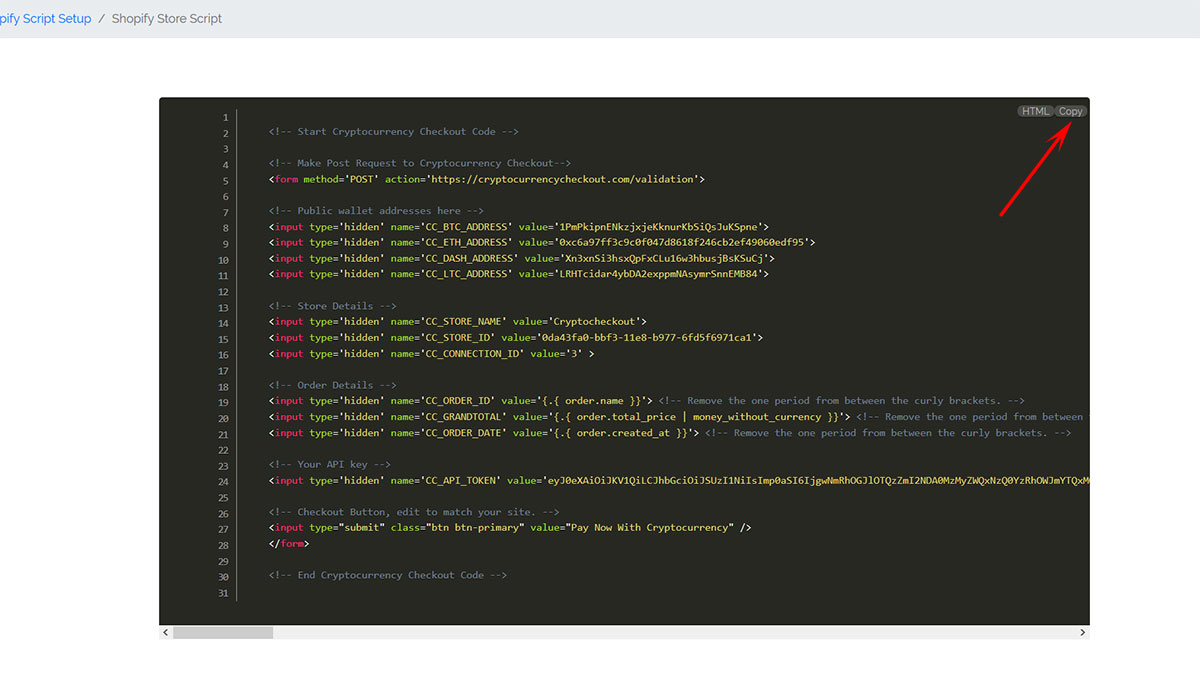
Click the “Generate Installation Scripts” button.
Your installation script will be automatically generated for your store.
Copy and paste it into notepad or another text editor.

Step 4: Installing the Script into your Shopify Store.
Login to your Shopify Admin Dashboard.
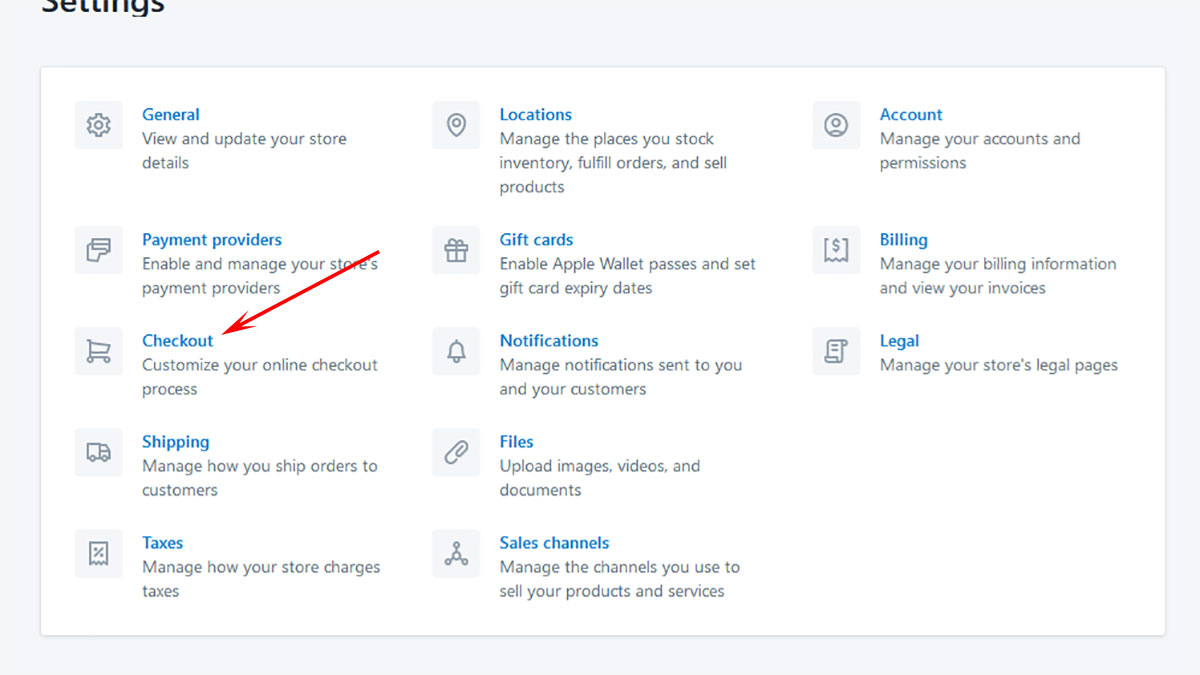
Click on the "Settings" Gear in the bottom left.
Select “Checkout” from the available options.
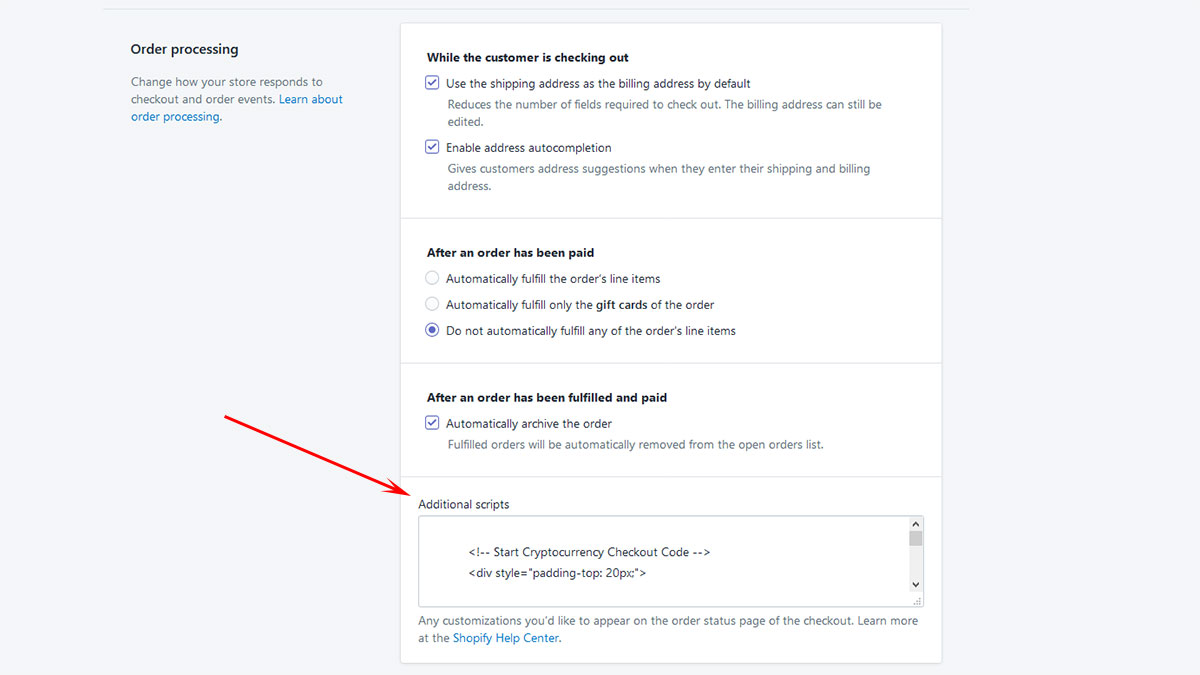
Scroll down the page to the “Order Processing” Section.
Find the "Additional Scripts" text input box, and paste the code you generated in Step #3.
Press Save.
Optional: Installing a backup Checkout Button inside your Shopify Customer Order History Page.
Sometimes you may want a backup Payment Button inside the Customer Order History Page, this button can be used by your customers to retry the payment if for some reason the customer did not fully complete the payment process on their first try.
To install the Button onto the Order History Page:
Log into your Shopify Admin Dashboard.
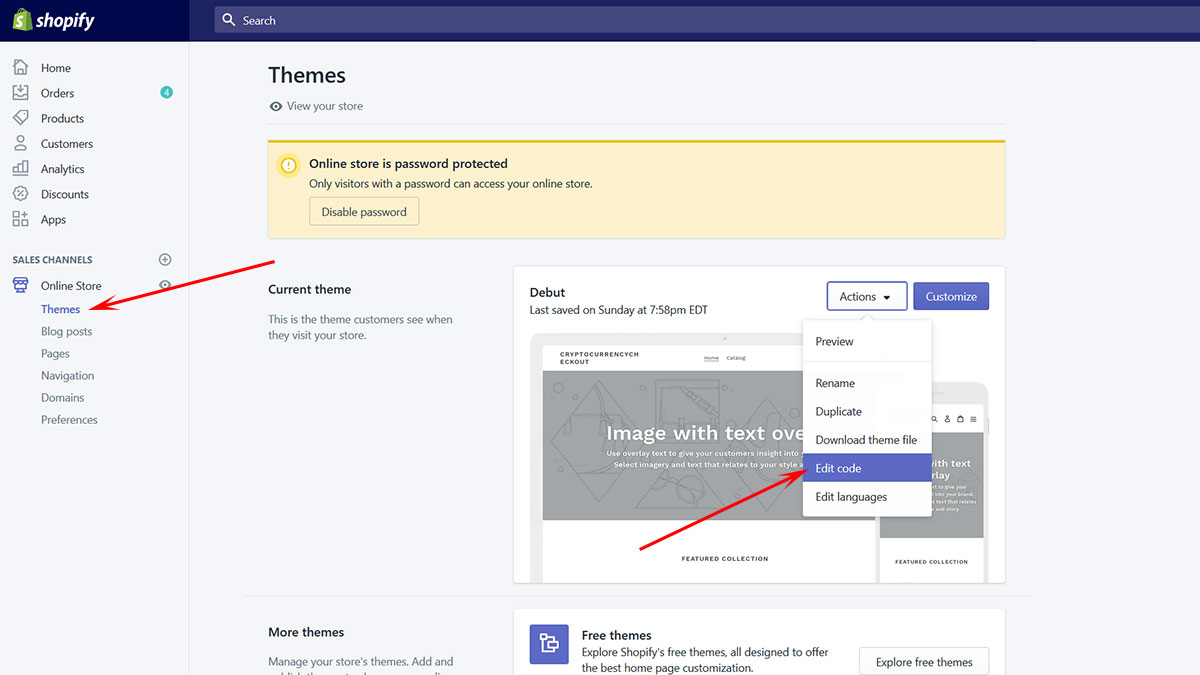
Click on the Online Store/Themes tab on the left.
In the current theme box go to “Actions”
Select “Edit Code”
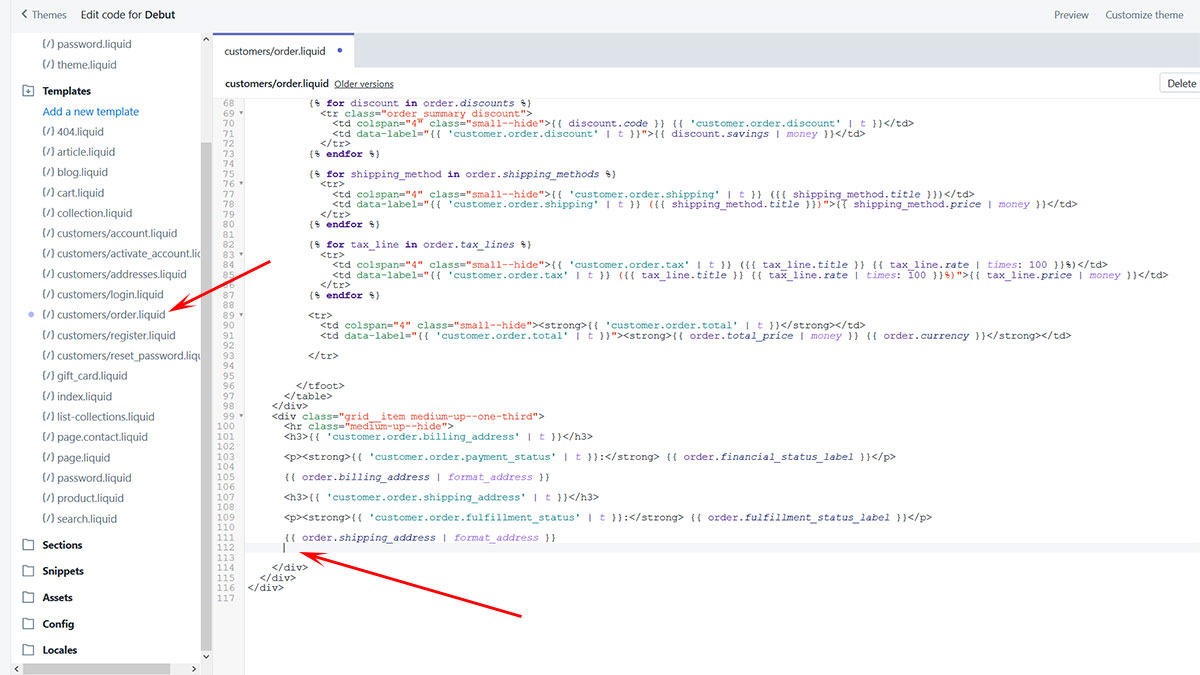
Go to the Templates section.
Locate and open: (/) customers/order.liquid
Scroll to the bottom of the code.
You should see: (( order.shipping_address | format_address ))
Followed by a few div close tags.
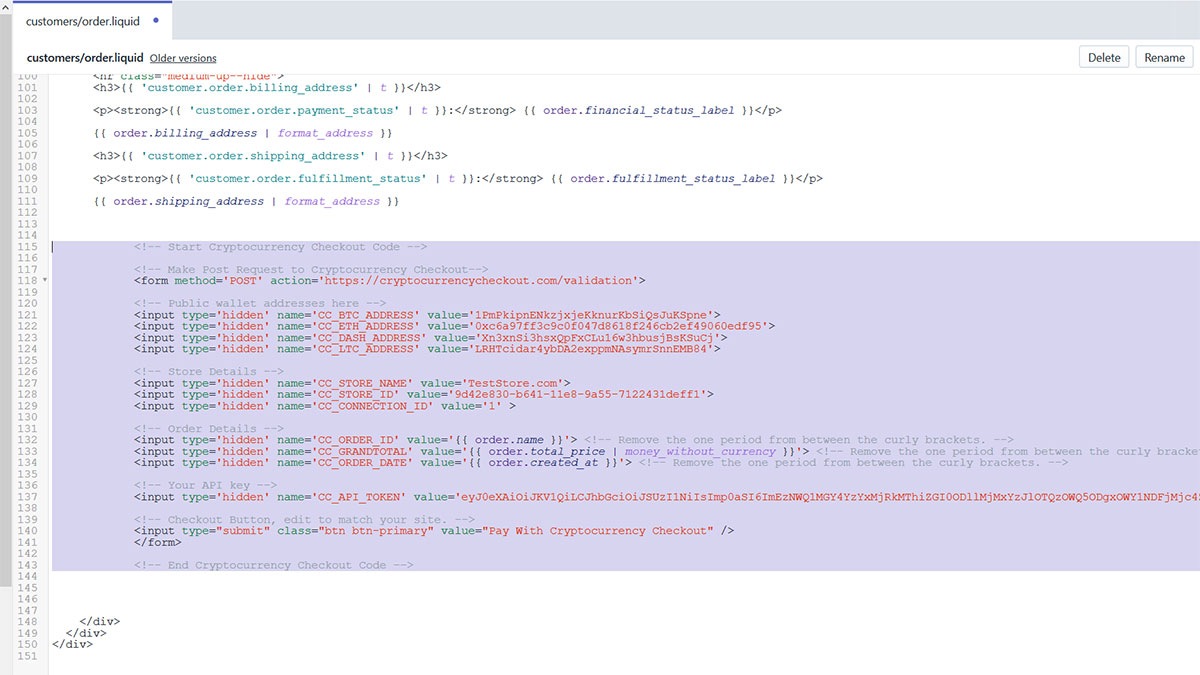
Paste the CryptocurrencyCheckout Script you generated between the order.shipping.address field, and the end div tags.
This will add the CryptoCheckout payment button to your Order History Page.
Press Save.
You have successfully integrated CryptocurrencyCheckout into Shopify!
We suggest you generate a test order on your store and go through the entire checkout process to make sure everything works as desired.
If you have any issues feel free to send us a message, or join us on discord.
Ads keep our service free · We don't endorse advertised products.
Ads keep our service free · We don't endorse advertised products.