Ads keep our service free · We don't endorse advertised products.
Ads keep our service free · We don't endorse advertised products.
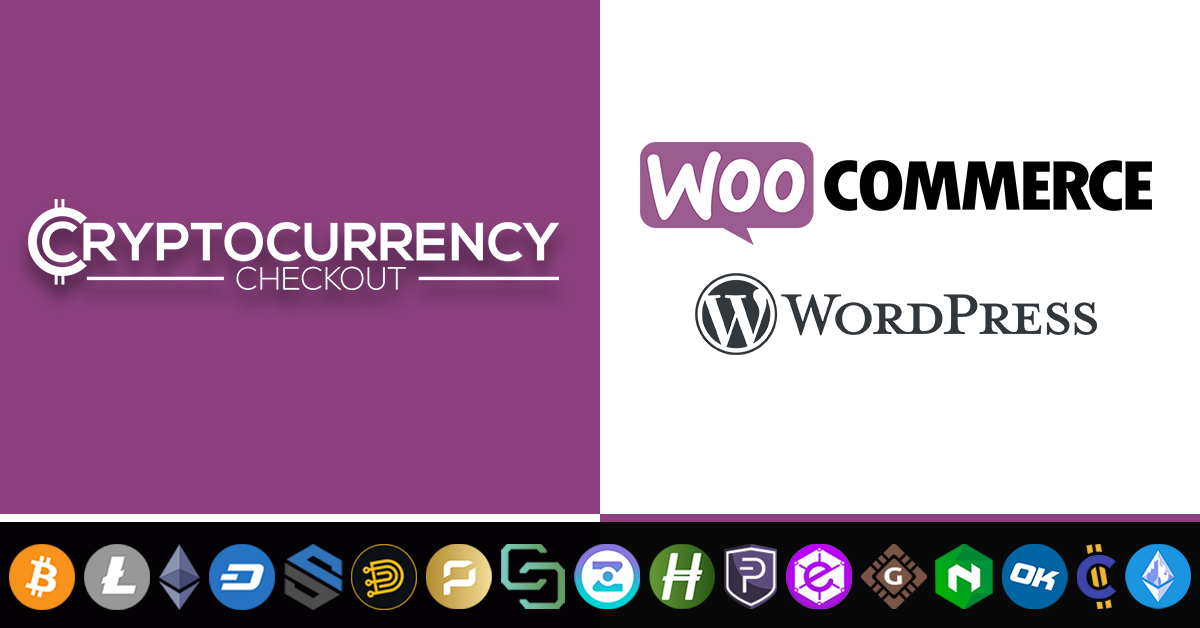
How to accept Cryptocurrency on WooCommerce Stores.
In this article we are going to show you how to integrate the CryptocurrencyCheckout Platform into your WooCommerce store so that you can start accepting Cryptocurrencies like: Bitcoin, Ethereum, Litecoin, Dash, Send, and CryptoDezireCash as payment for your sales.
Things we want to achieve in this integration:
- We would like to maintain all of our orders inside of WooCommerce's platform. This includes using WooCommerce's checkout process to securely generate an order, collect buyer info, calculate shipping costs, taxes, offer discounts, allow coupon codes, etc.
- We would also like to leave the ability for customers to be able to review their past orders, and maintain all order records on our WooCommerce store itself.
- We want the order to stay in “On Hold” status until we can manually verify we have received the crypto payment, allowing us to make sure that all confirmations are received on the blockchain before changing the order status to “Processing” or "Completed".
- We want to be able to use our standard Shipping and Bookkeeping integrations for WooCommerce, without needing any additional plugins or software to add CryptocurrencyCheckout to our store.
Now that we've discussed how we plan to integrate, let's get started with the installation.

WooCommerce Cryptocurrency Checkout Installation.
Step 1: Create CryptocurrencyCheckout Connection.
Log into your CryptocurrencyCheckout.com Dashboard.
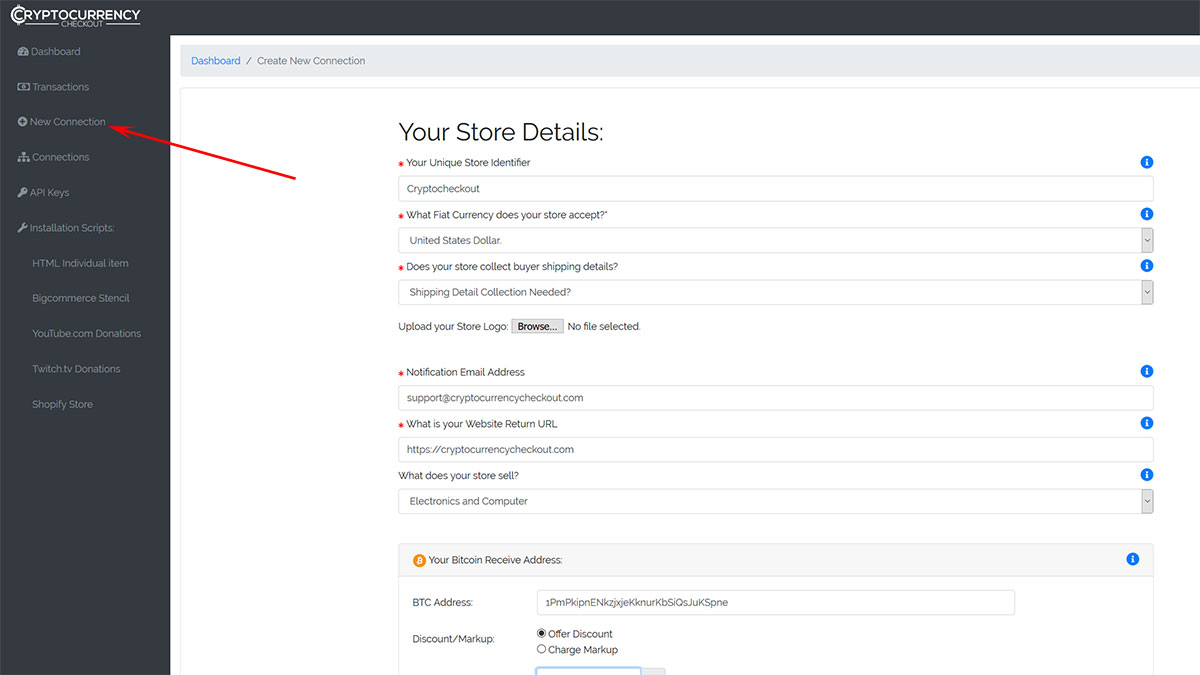
Click on the “New Connection” option.
Insert your Store details.
Now insert the Wallet Addresses of all the Cryptocurrencies you would like to receive.
If there is any Cryptocurrencies you do not want to accept on your store just leave the section blank.
Optional: Select if you would like to charge a markup to accept an individual crypto, or offer a store discount.
Optional: You can also view how to use our Market Volatility Protection Tools Here
Click Submit.

Step 2: Generate CryptocurrencyCheckout WooCommerce Integration.
Log into your CryptocurrencyCheckout.com Dashboard.
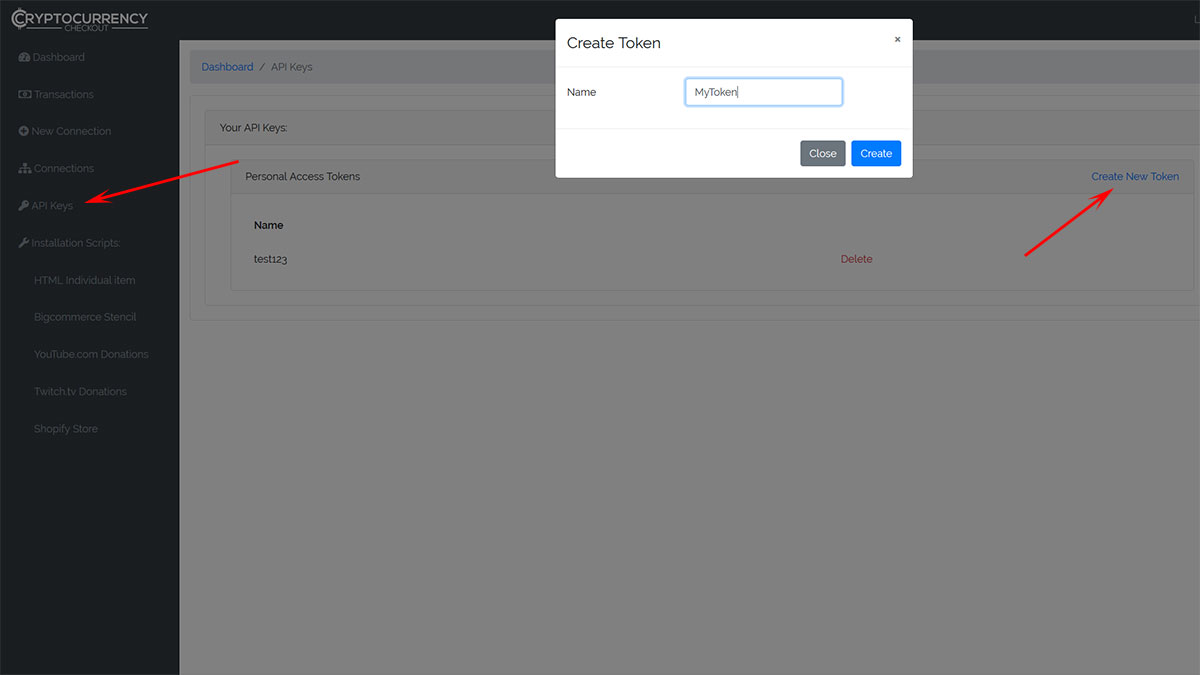
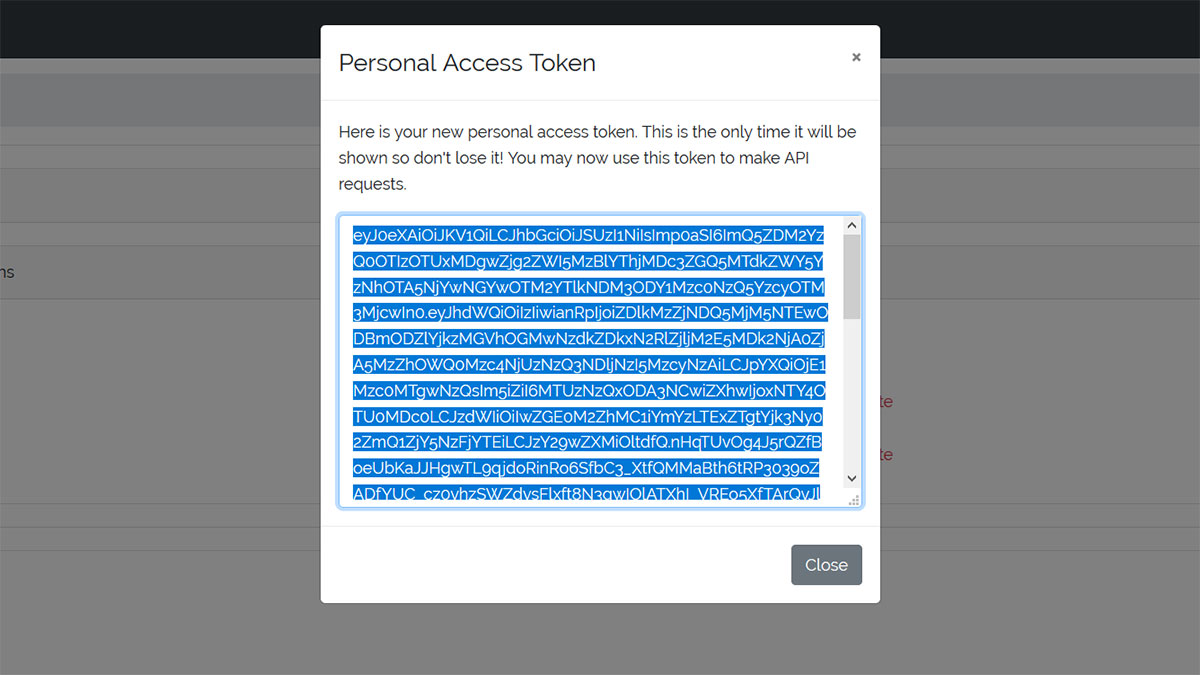
Click “API Keys” Generate an API key for your store.
Copy and paste the API Key into notepad, or another text editor for later.
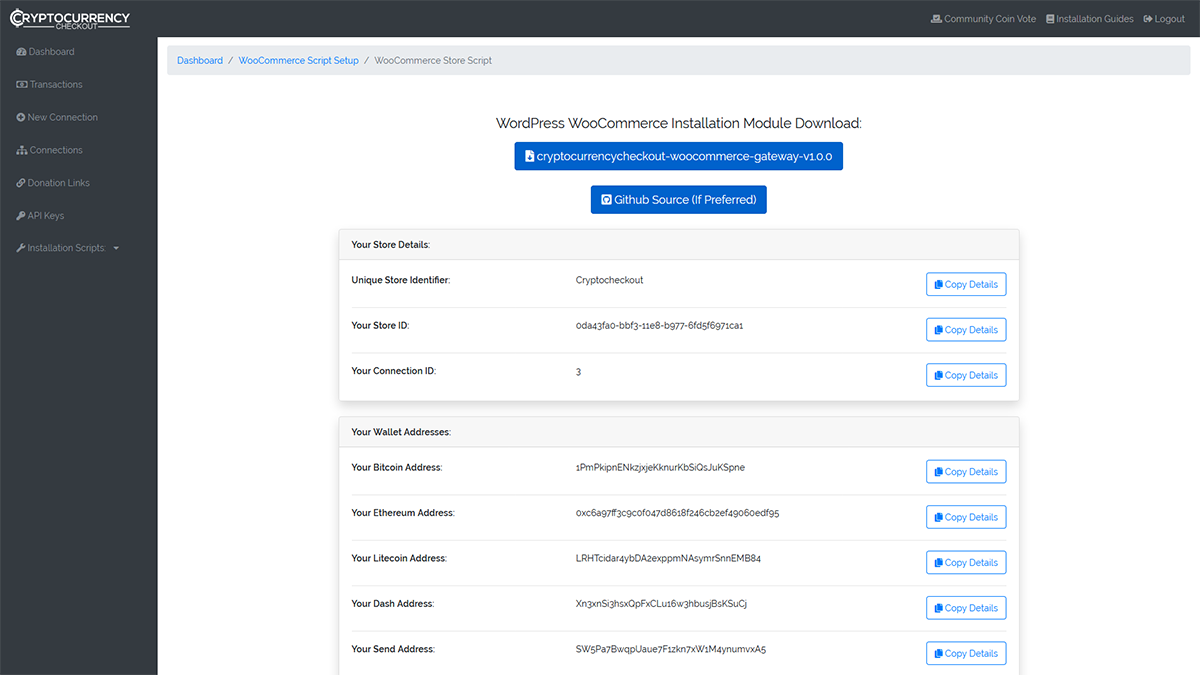
In the dashboard, go to the Installation Scripts section, and select “WooCommerce Store”
Paste the API key you saved earlier into the “Insert API Key” Section.
Click the “Generate Installation Scripts” button.
The Installation Settings and your WooCommerce Plugin will be automatically generated.
Keep this page open in a separate tab so you can refer back to it later.

Step 3: Installing the WooCommerce Plugin on your Wordpress Site.
Our Plugin is now available on the Wordpress Plugin Directory.
You can install it directly in your WordPress Dashboard by navigating to Plugins > Add New and typing: CryptocurrencyCheckout into the search bar.
Download the latest version of the CryptocurrencyCheckout-WooCommerce-Gateway.zip
Or go to our GitHub and download the latest Github Source Code there.
(Installation Method #1: Wordpress Plugin Installer)
Login to your WordPress Admin Dashboard.
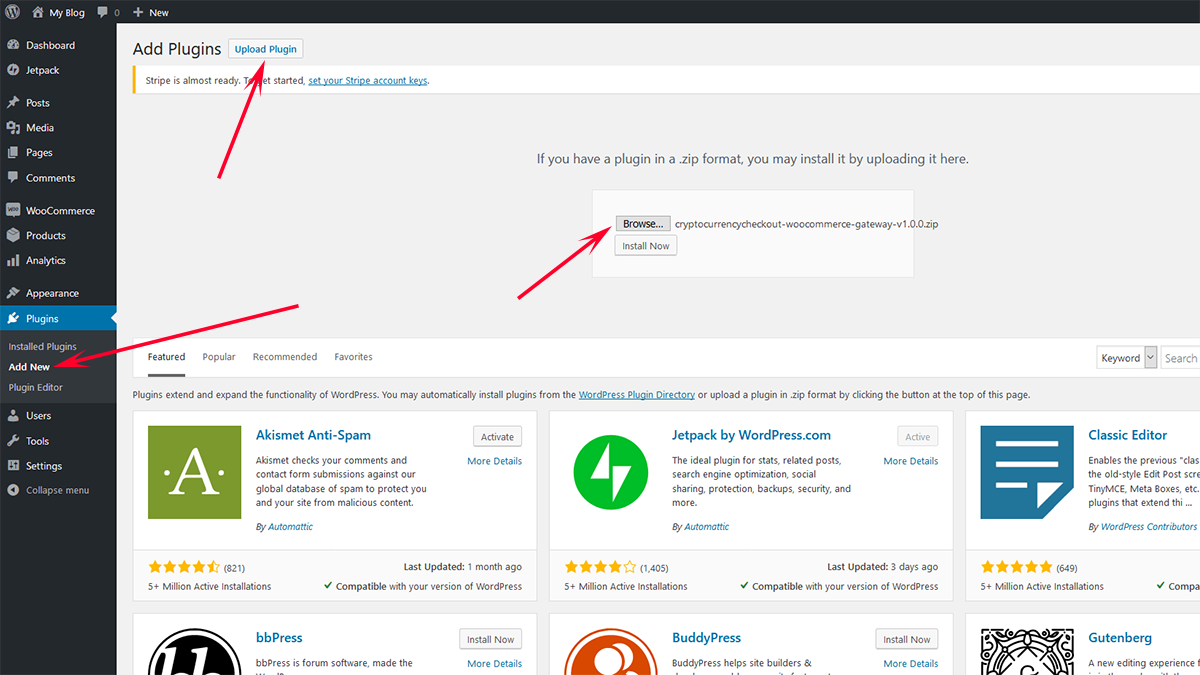
Click on the "Plugins" section, and press "Add New".
At the Top Left of the Page Click the “Upload Plugin” button.
(Or Installation Method #2: FTP Upload Plugin to Plugins Folder)
FTP into your webserver, or use the Cpanel File Manager.
Go into the public_html/your_wordpress_folder/wp-content/plugins folder.
Upload the CryptocurrencyCheckout-WooCommerce-Gateway.zip file.
Extract the zip file contents into the plugins folder. The extracted files should be located at:
public_html/your_wordpress_folder/wp-content/plugins/cryptocurrencycheckout-woocommerce-gateway
In your Wordpress Admin Dashboard, go to "Plugins" Section, and Click "Installed Plugins".
Activate the CryptocurrencyCheckout WooCommerce Gateway
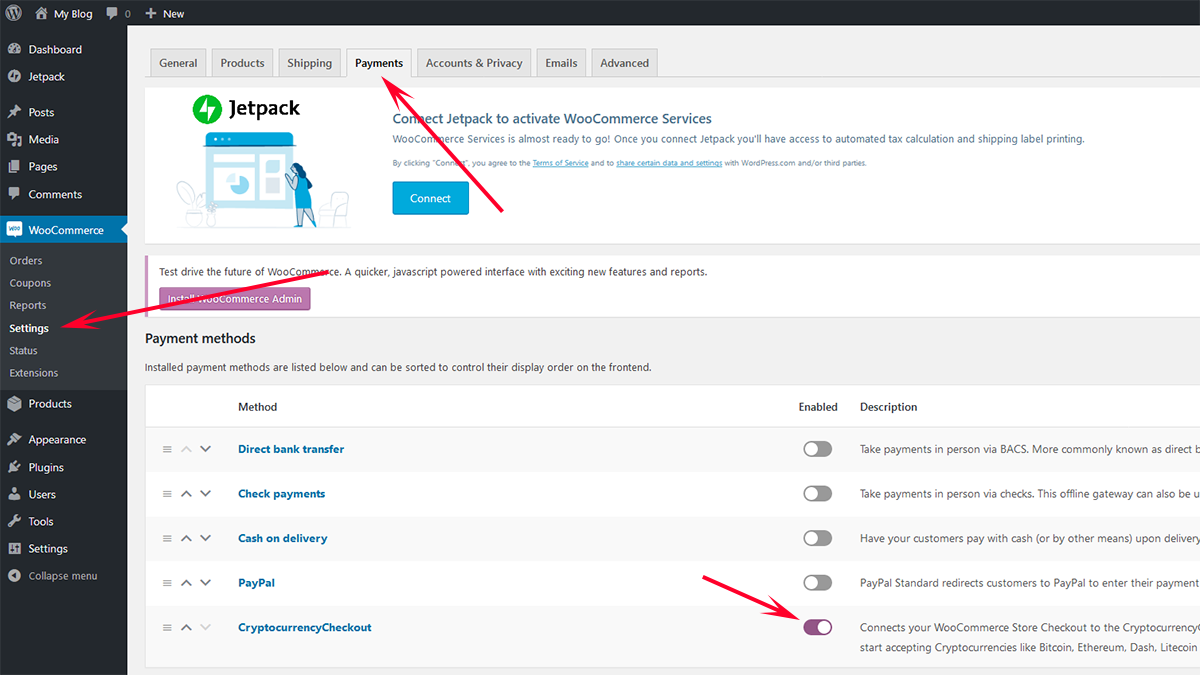
Go to the WooCommerce Section, click Settings.
Press the Payments Tab at the top, Enable CryptocurrencyCheckout, and press Manage.
Copy and Paste all of the Settings you generated in your CryptocurrencyCheckout Dashboard on Step #2.
Click Save Changes.


Step 4: Testing your CryptocurrencyCheckout WooCommerce Integration.
To confirm your Integration is properly working create a test order:
Add Test Item to Shopping Cart and View Cart.
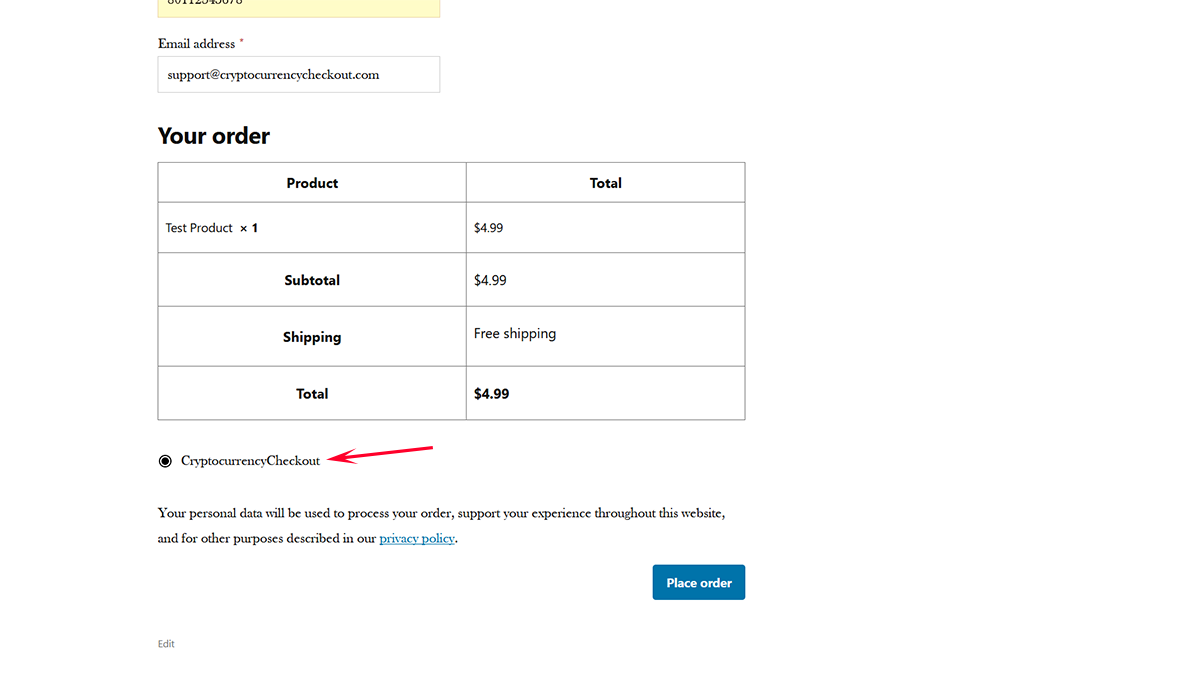
Proceed to Checkout
Select CryptocurrencyCheckout as the Payment Method.
Click Place Order
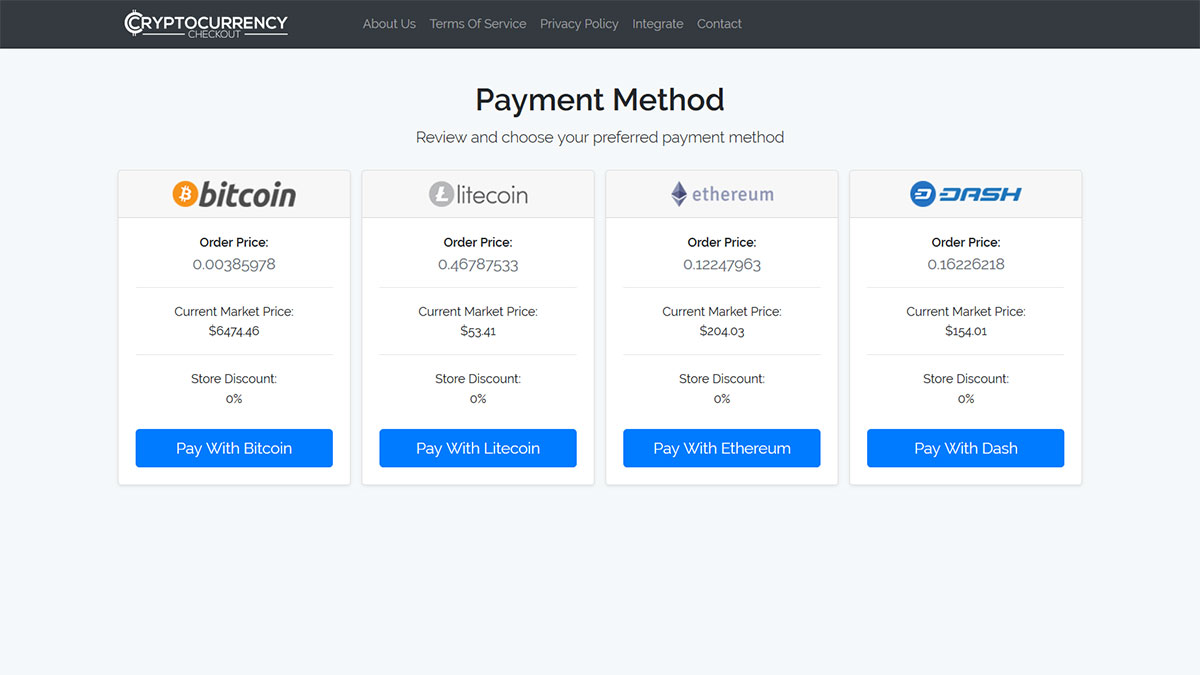
Click the “Pay Now with CryptocurrencyCheckout” button.
Verify all of the Wallet Addresses and Order info, and make sure the Validation Tests all have a Green Check Mark.
If you like you can now proceed to making a test payment.
Step 5: Marking a Payment as Received on WooCommerce.
Login to your Wordpress Admin Dashboard.
Go to the WooCommerce Section and Click Orders.
You will see the Test Orders Marked as “On Hold”
Verify the Coins are in your chosen Cryptocurrency Wallet (The addresses you input in Step #1.)
You may also use a Block Explorer to verify if the transaction was processed.
Go to the order on WooCommerce, and in the Status section, mark it as "Processing", or "Completed" to notify the customer their order is being processed.
Optional Settings:
We have included many optional Settings, including:
The ability to name the “Pay with CryptocurrencyCheckout” Button.
You can Enable Auto Redirect, so that when an order is placed and the customer is sent to the Thank you Page it will automatically send the customer to CryptocurrencyCheckout to make payment.
You have successfully integrated Cryptocurrency Checkout into WooCommerce!
If you have any issues feel free to send us a message, or join us on discord.
Ads keep our service free · We don't endorse advertised products.
Ads keep our service free · We don't endorse advertised products.